| View previous topic :: View next topic |
| Author |
Message |
Nejtun
*
Joined: 10 Jul 2011
Posts: 43
Location: Hastings
|
 Posted: Fri Jul 12, 2013 7:11 Post subject: Samurai Rebuild (hopefully) :) Posted: Fri Jul 12, 2013 7:11 Post subject: Samurai Rebuild (hopefully) :) |
 |
|
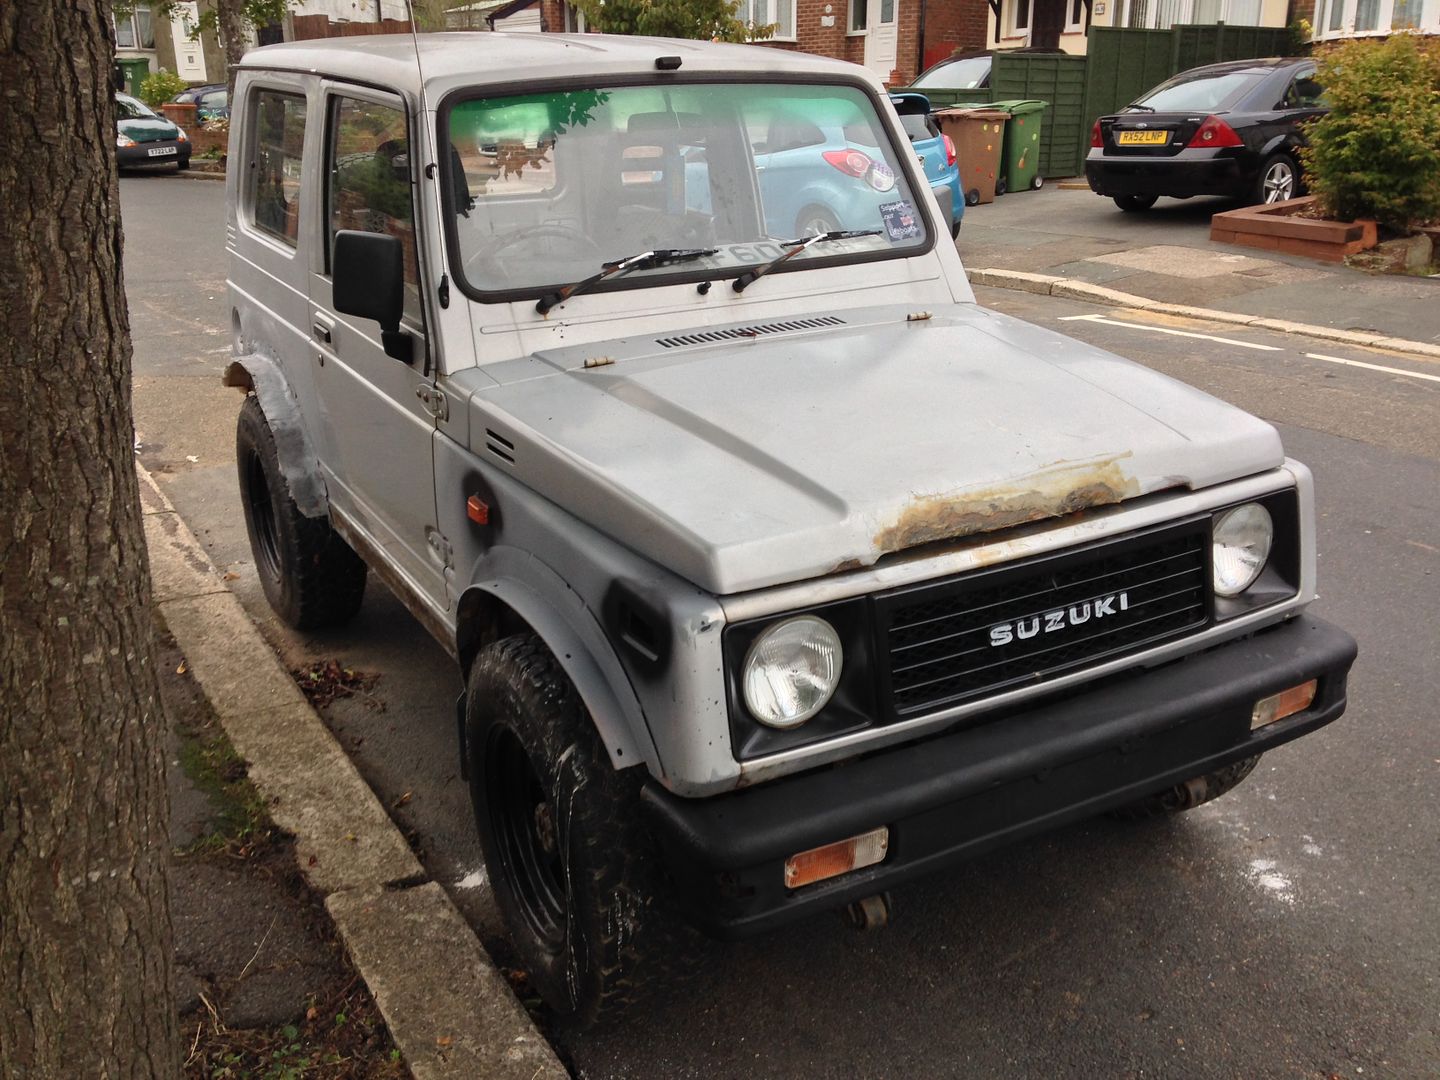
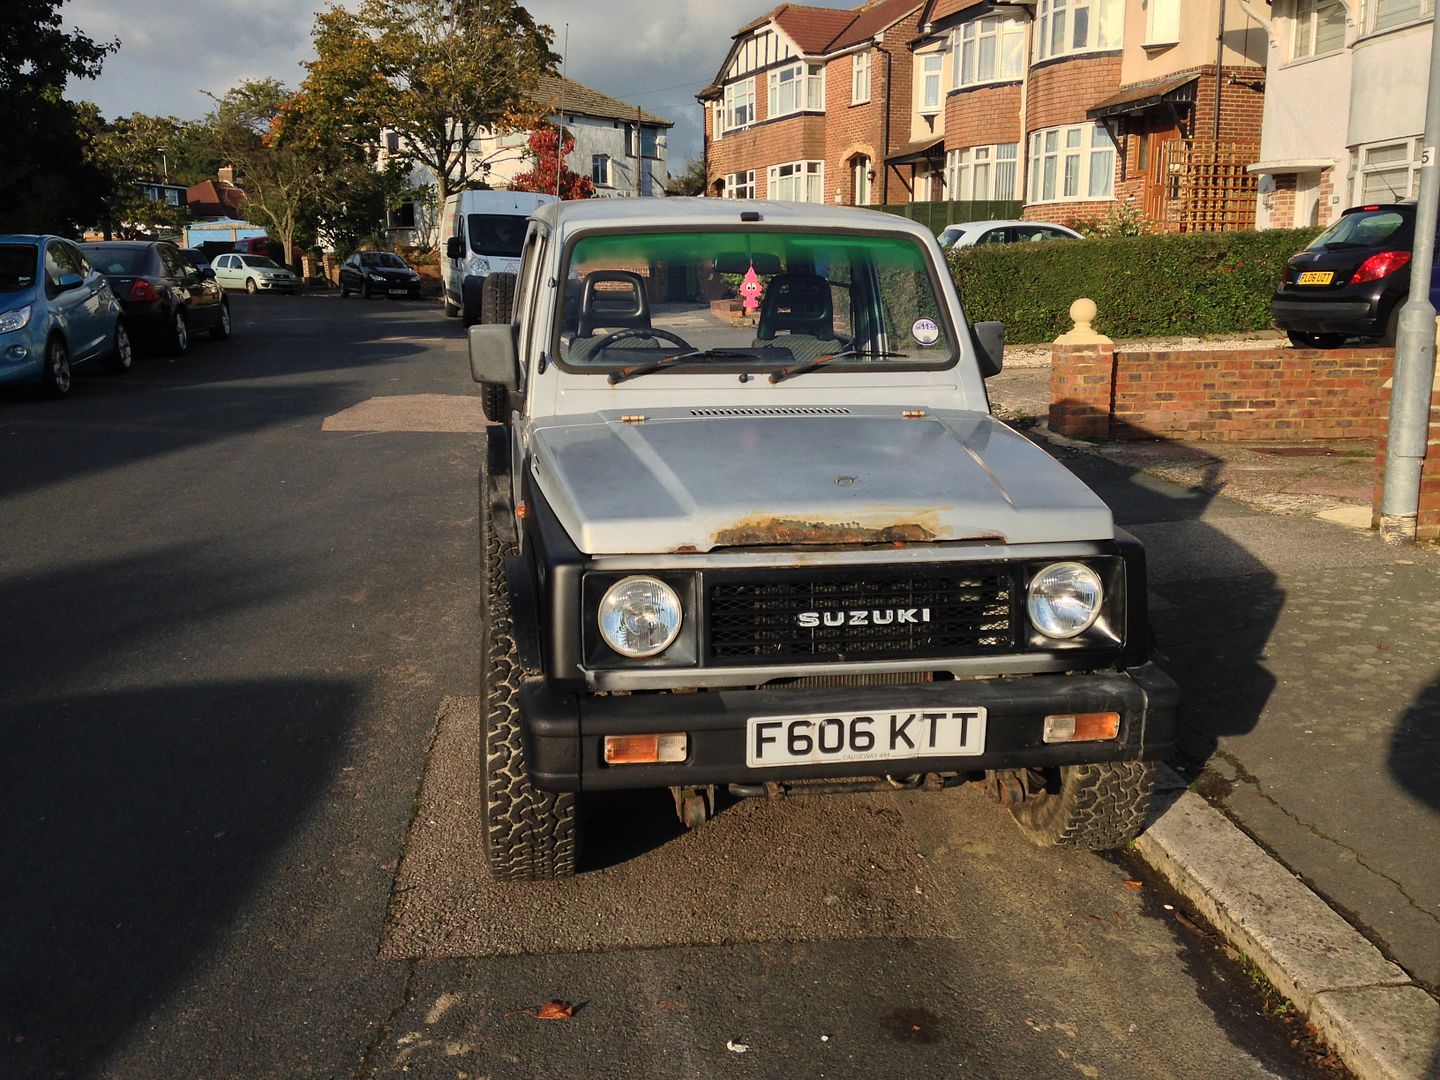
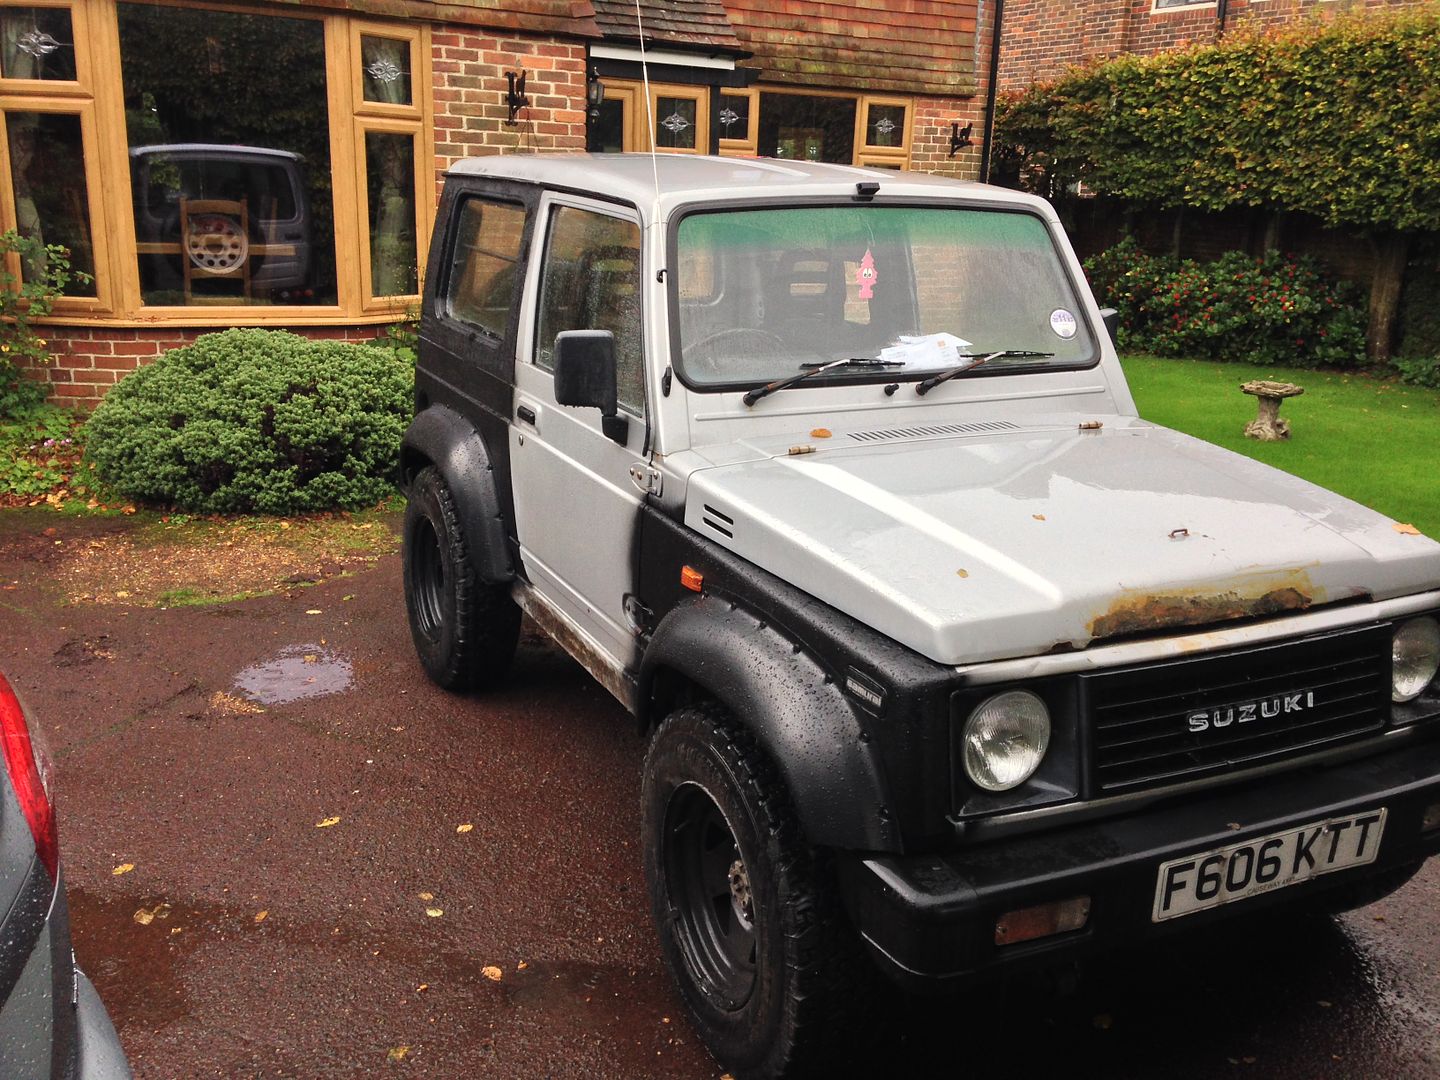
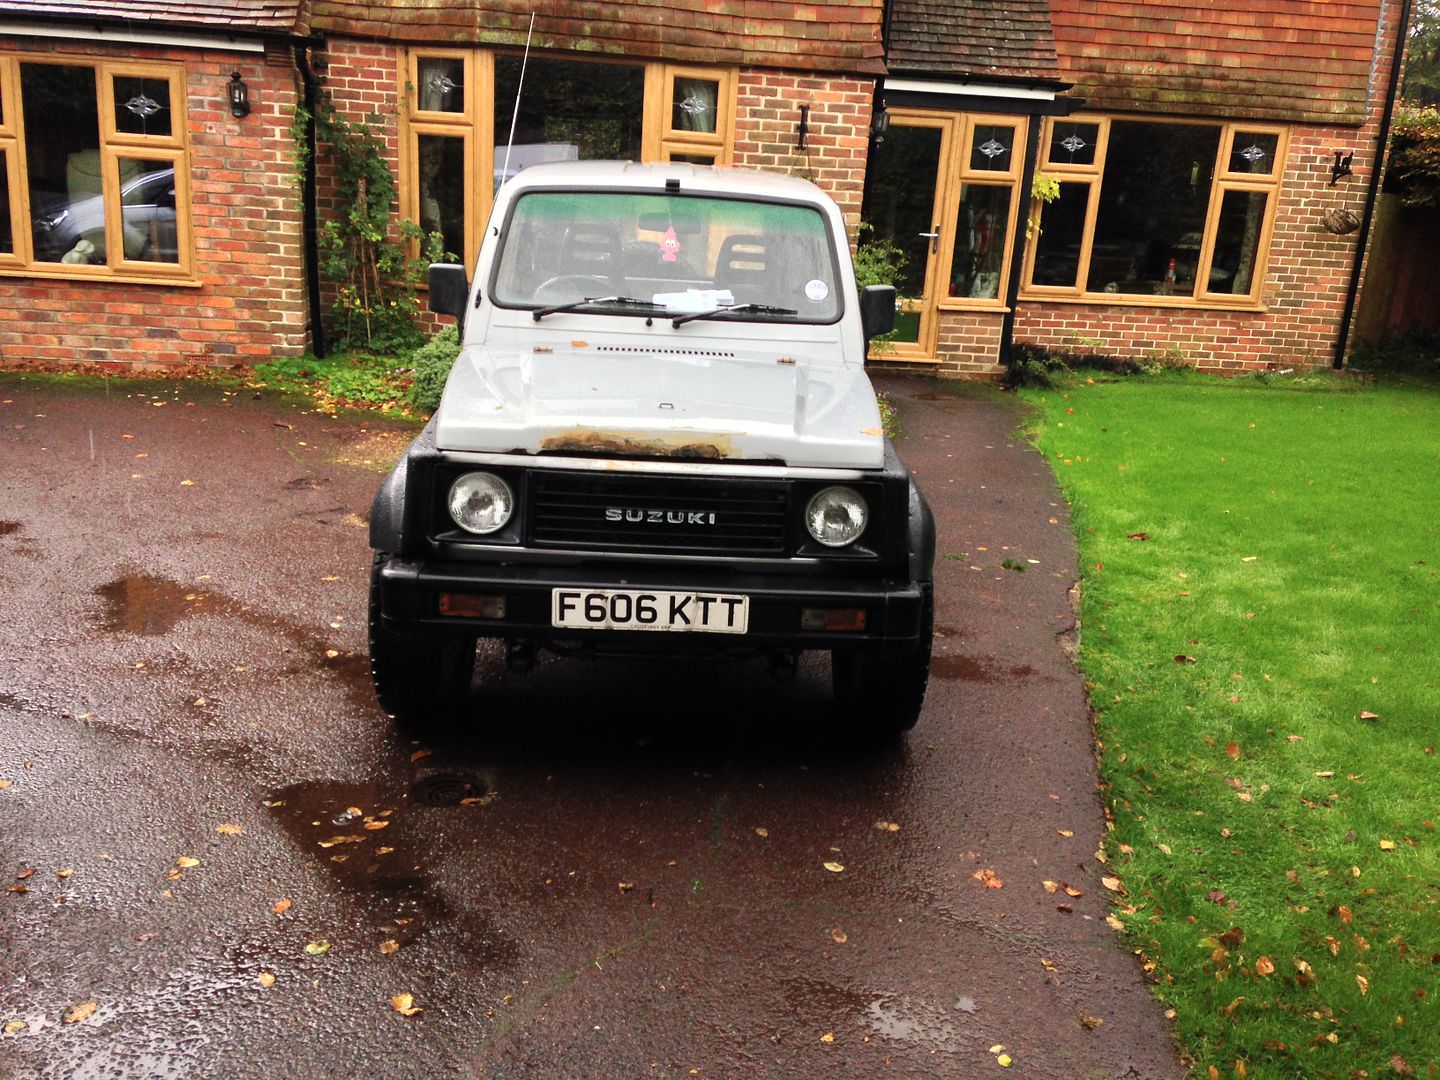
Ok so I got a new Samurai, its my fourth and I am determined not to sell this one!
first pics are of the car as i got it, will put as many notes and updates as I can , any advice on the bits I get stuck on will be much appreciated 
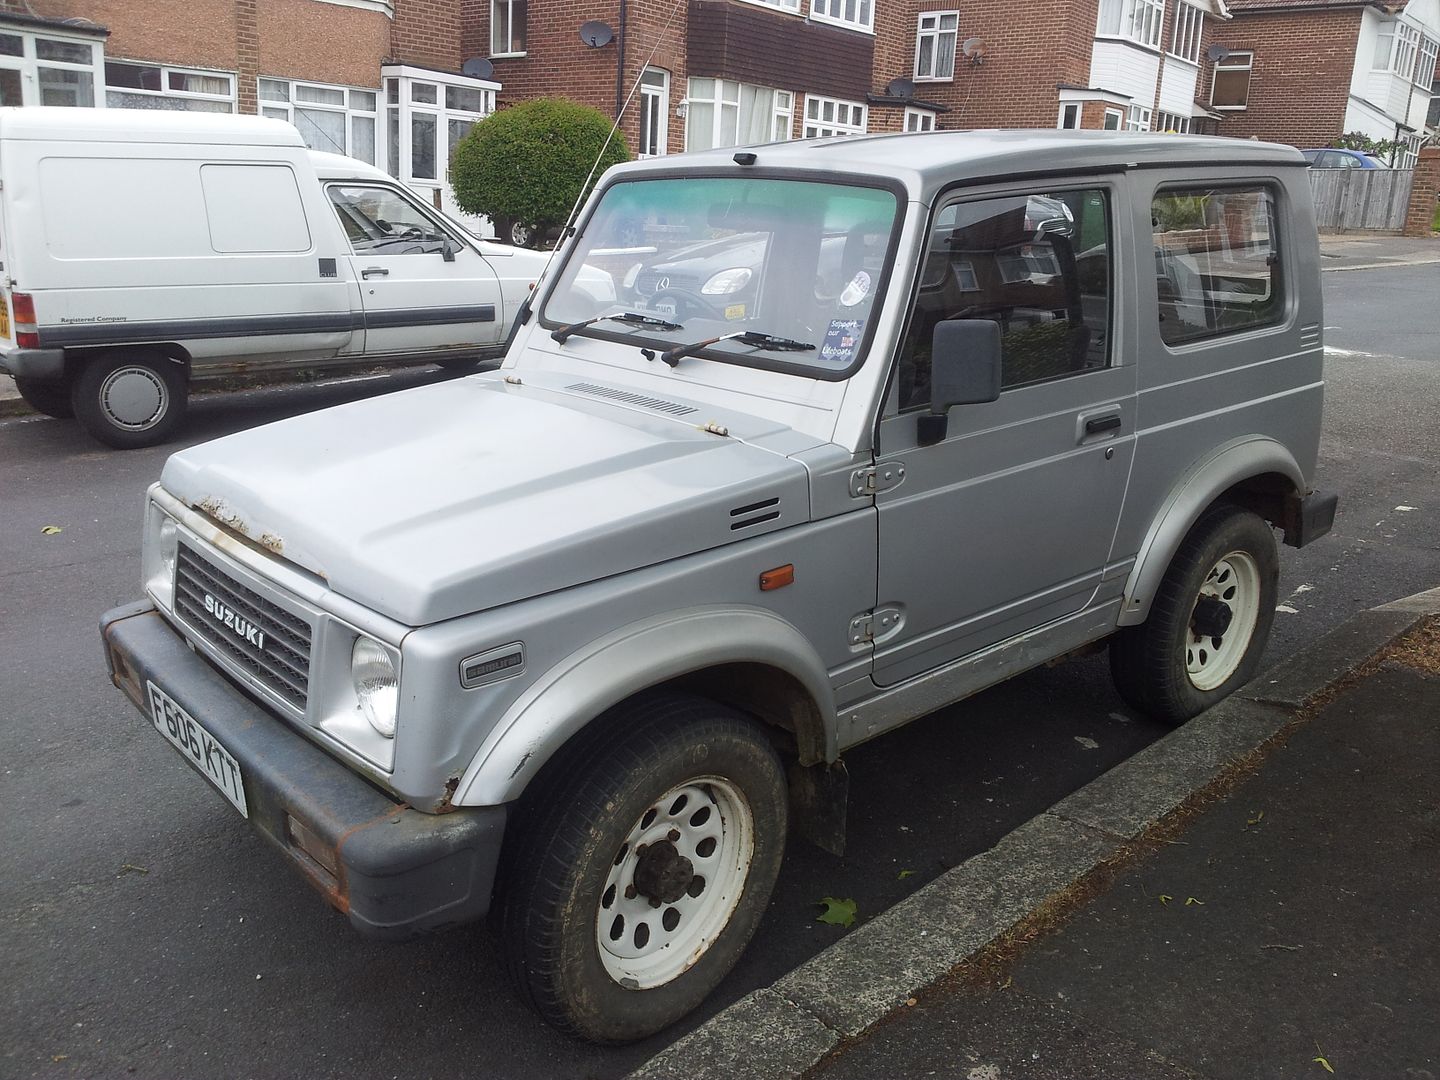
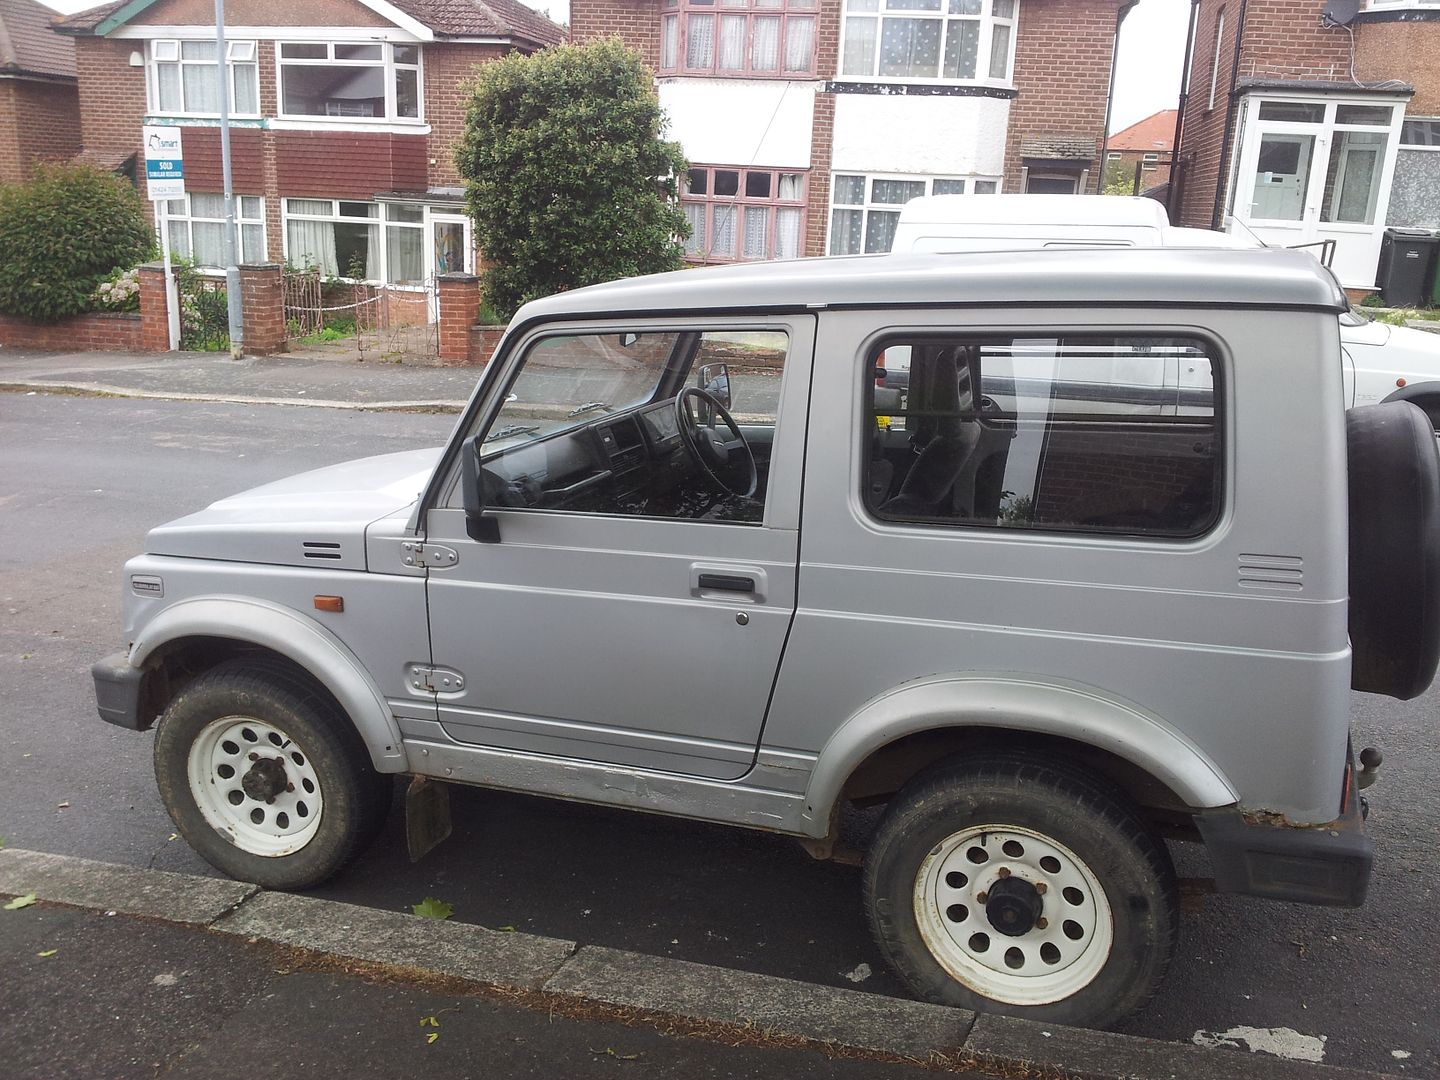
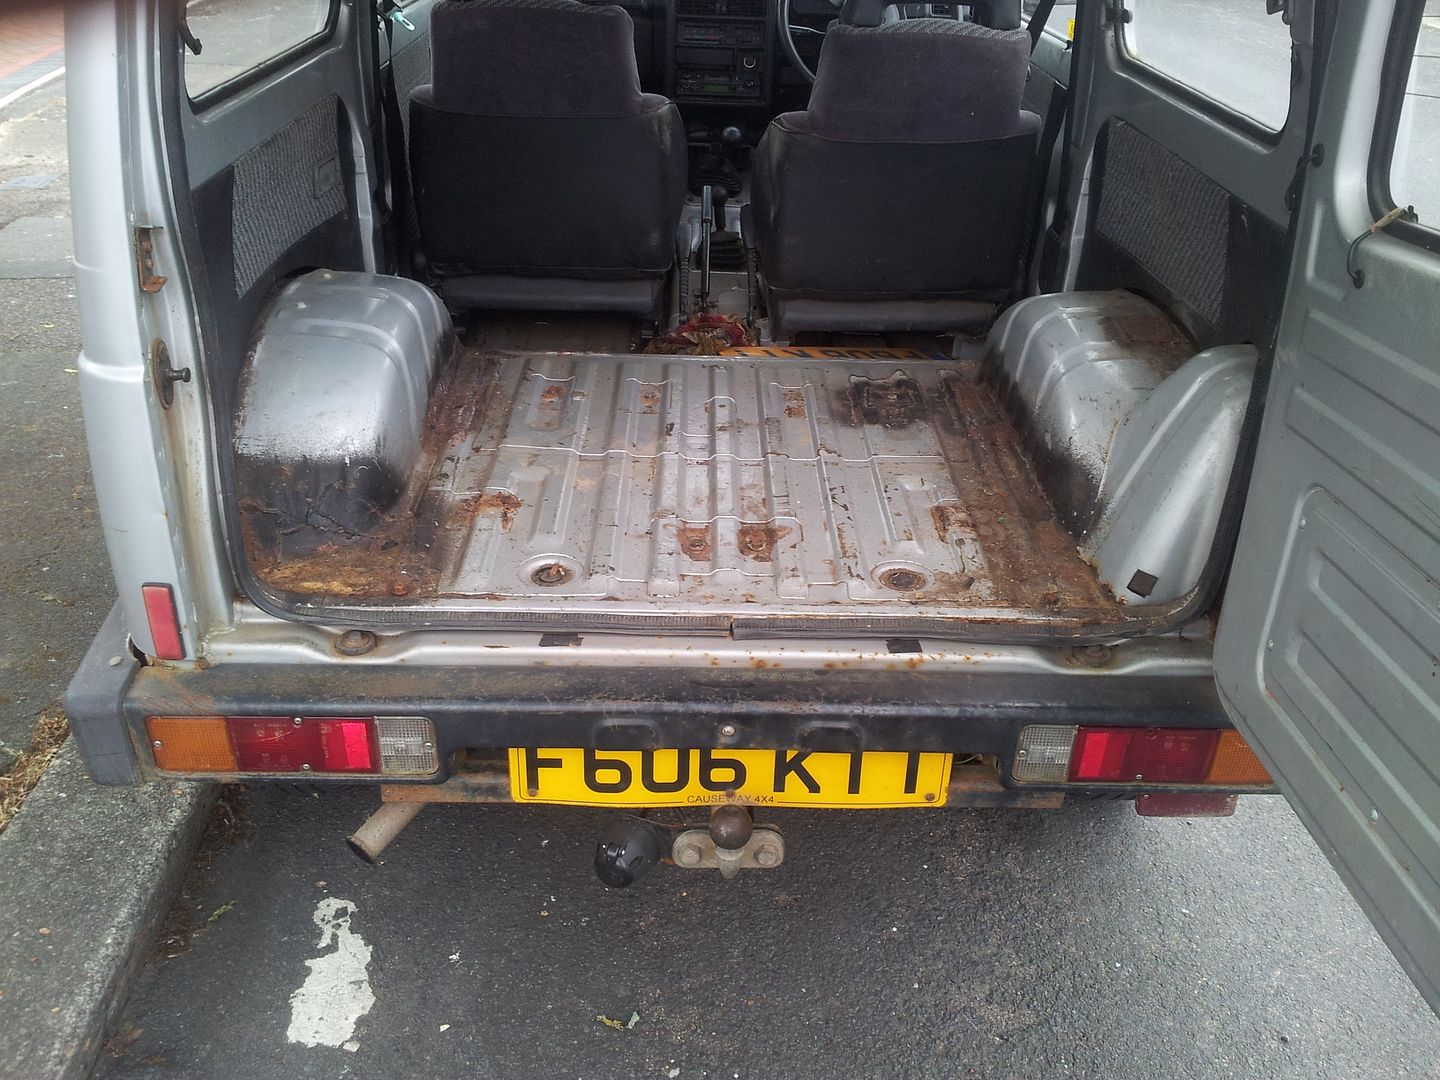
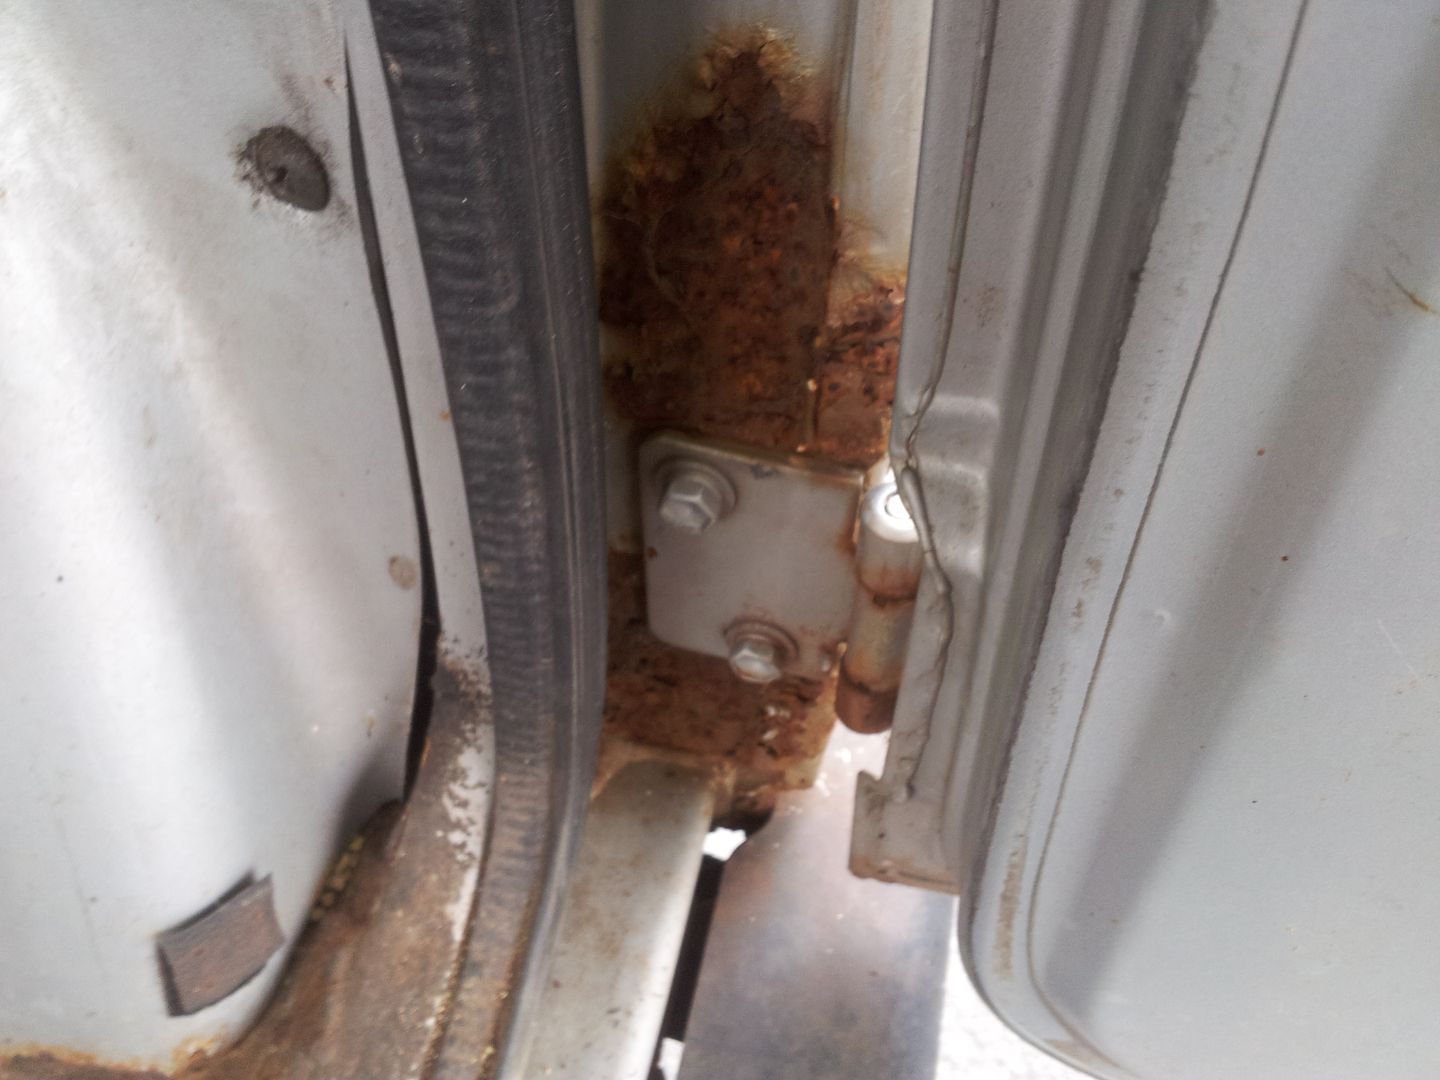
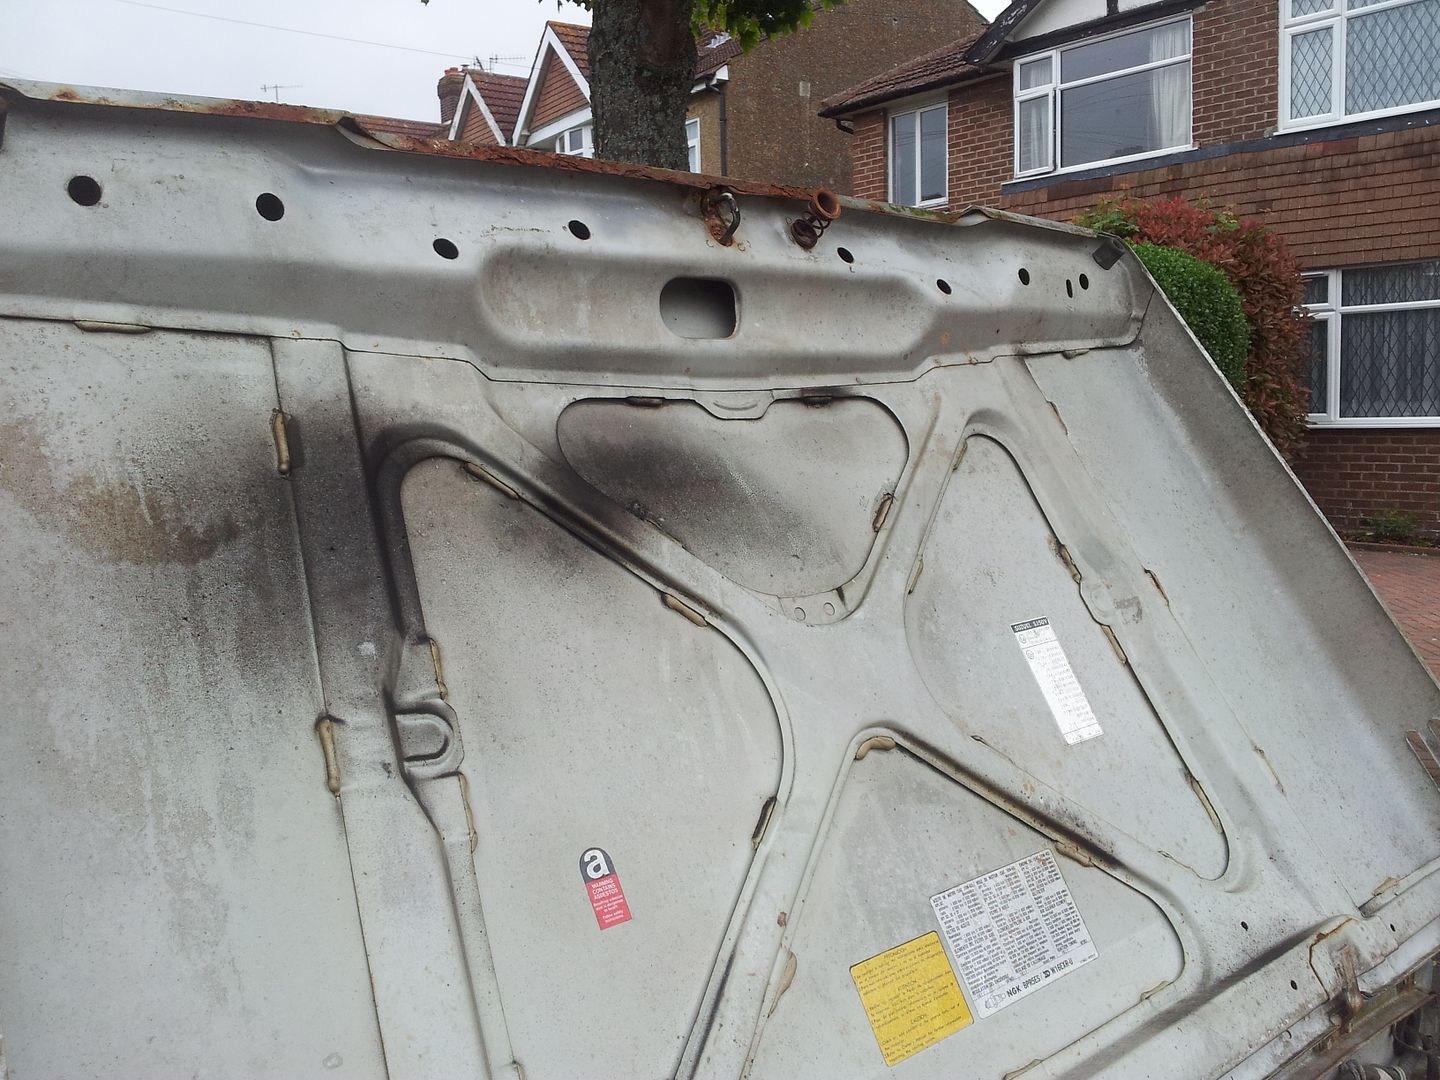
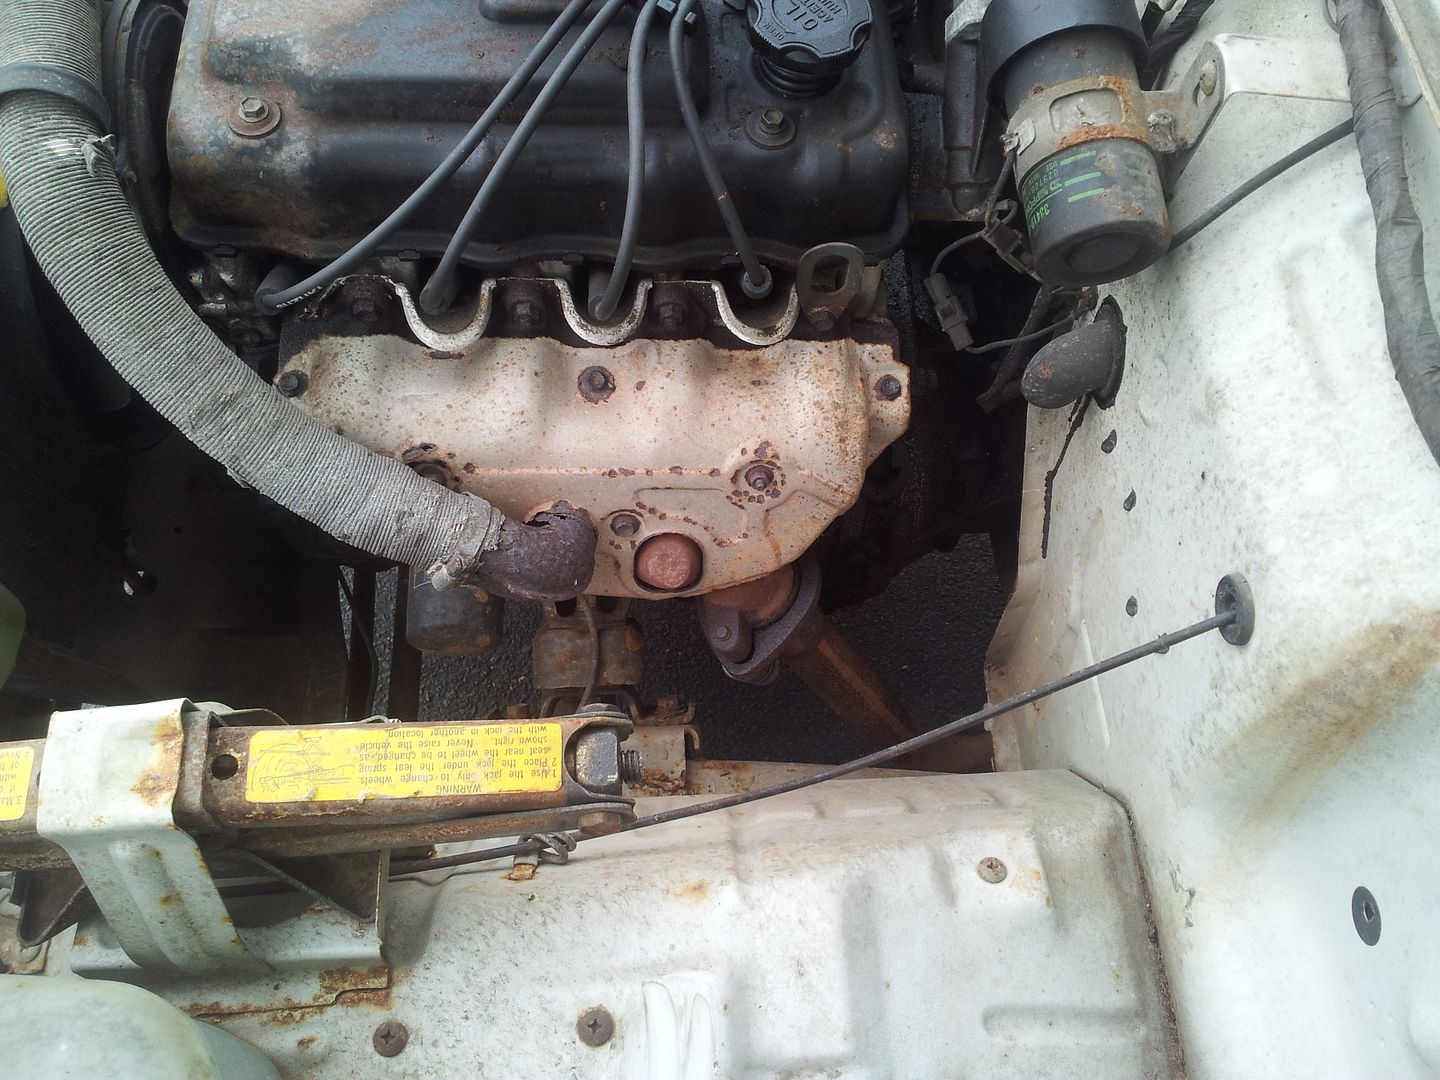

this is what I have to start with , I have done a couple of bits already , but I will spread them over a couple of posts |
|
| Back to top |
|
 |
Google
Sponsor

|
| Posted: Fri Jul 12, 2013 7:11 Post subject: Google Ads keep this community free to join! |
|
|
|
|
| Back to top |
|
|
me and the wife
*******

Joined: 07 Aug 2007
Posts: 1013
Location: gosport
|
| Posted: Sun Jul 14, 2013 9:26 Post subject: |
|
|
| hello, hope u can weld lol |
|
| Back to top |
|
|
Nejtun
*
Joined: 10 Jul 2011
Posts: 43
Location: Hastings
|
| Posted: Mon Jul 15, 2013 7:03 Post subject: |
|
|
| me and the wife wrote: |
| hello, hope u can weld lol |
I can  which is lucky! I am quite handy with fibre glass as well so hopefully it will look good as new in a couple of months rather than a tetanus injection waiting to happen :p which is lucky! I am quite handy with fibre glass as well so hopefully it will look good as new in a couple of months rather than a tetanus injection waiting to happen :p |
|
| Back to top |
|
|
Nejtun
*
Joined: 10 Jul 2011
Posts: 43
Location: Hastings
|
| Posted: Mon Jul 15, 2013 7:12 Post subject: |
|
|
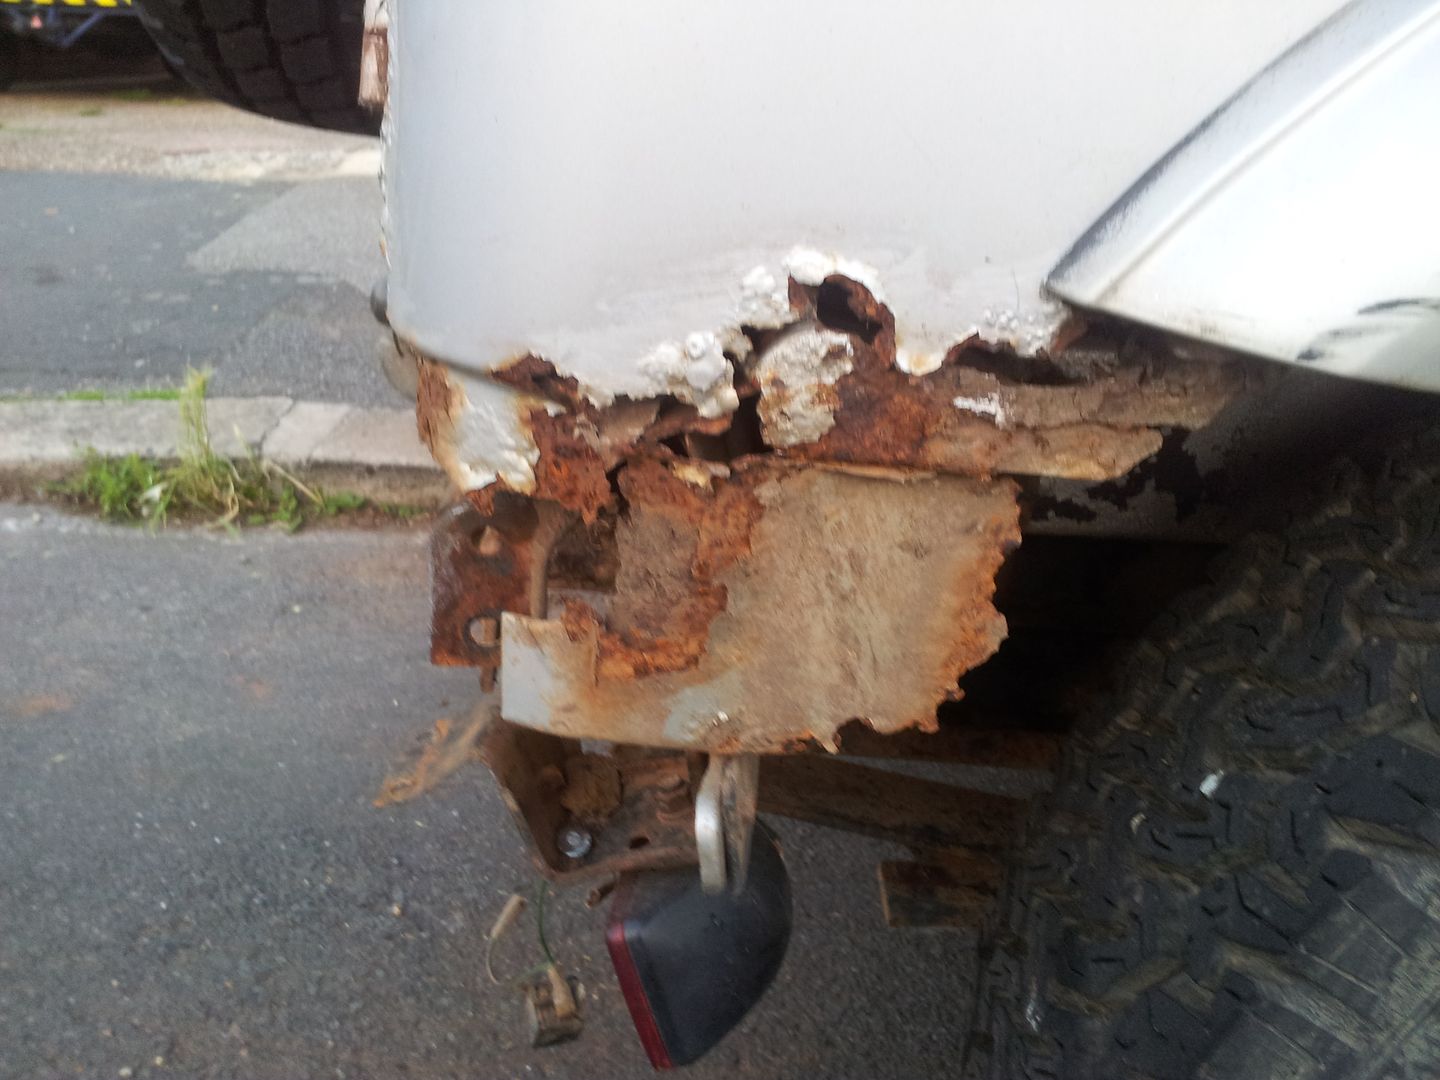
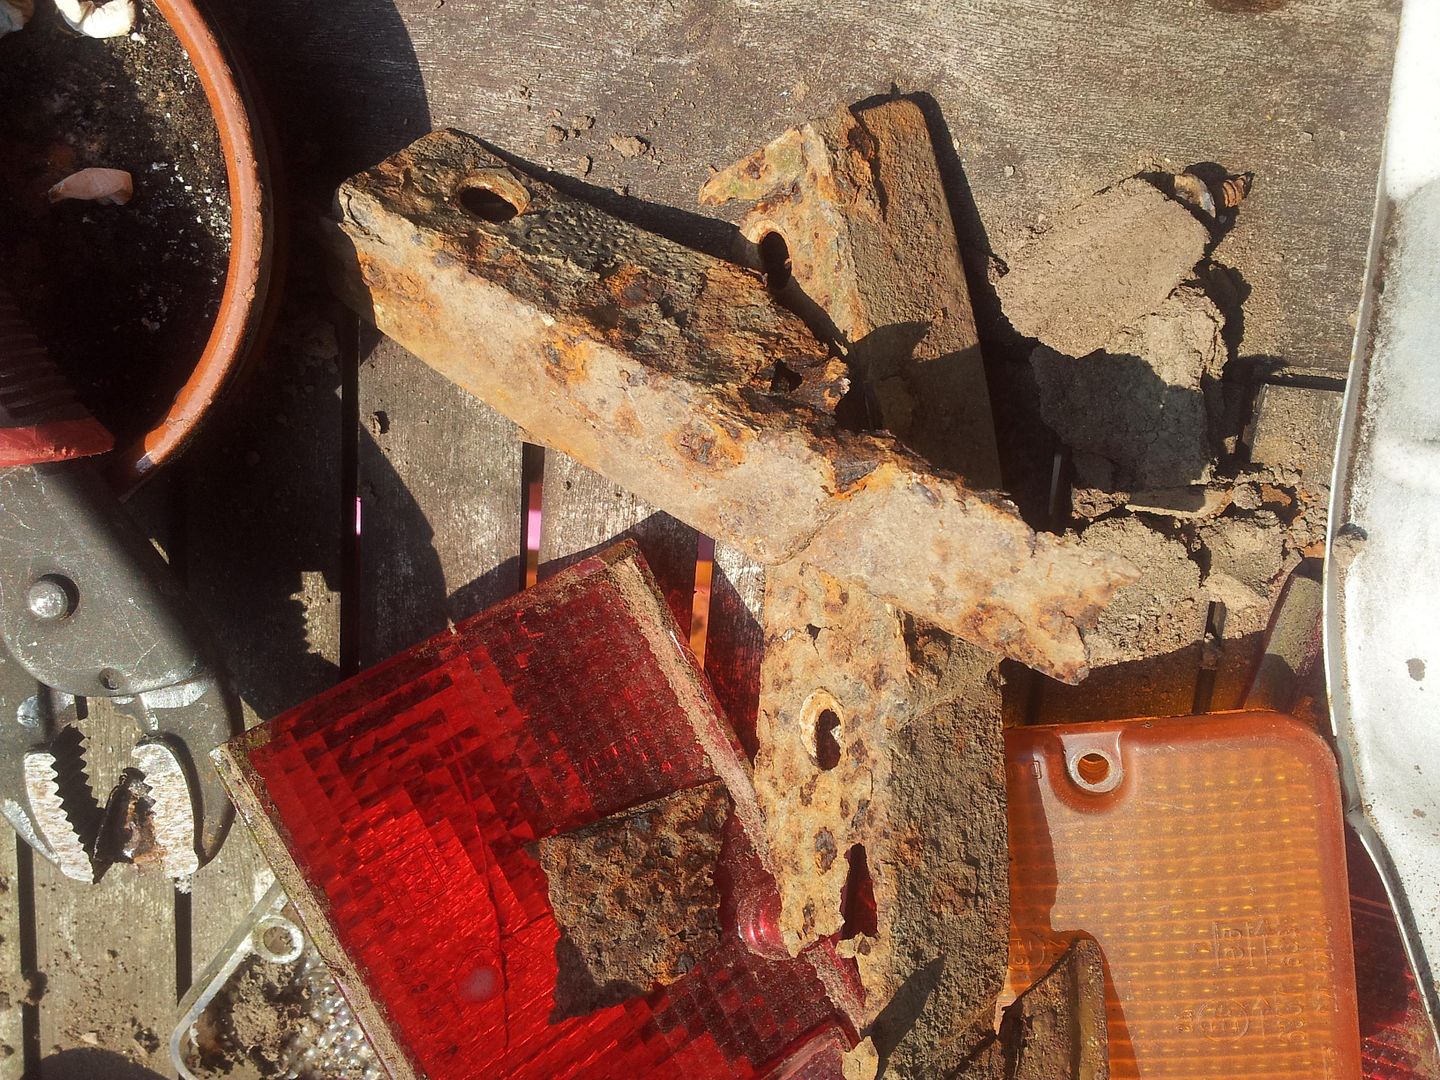
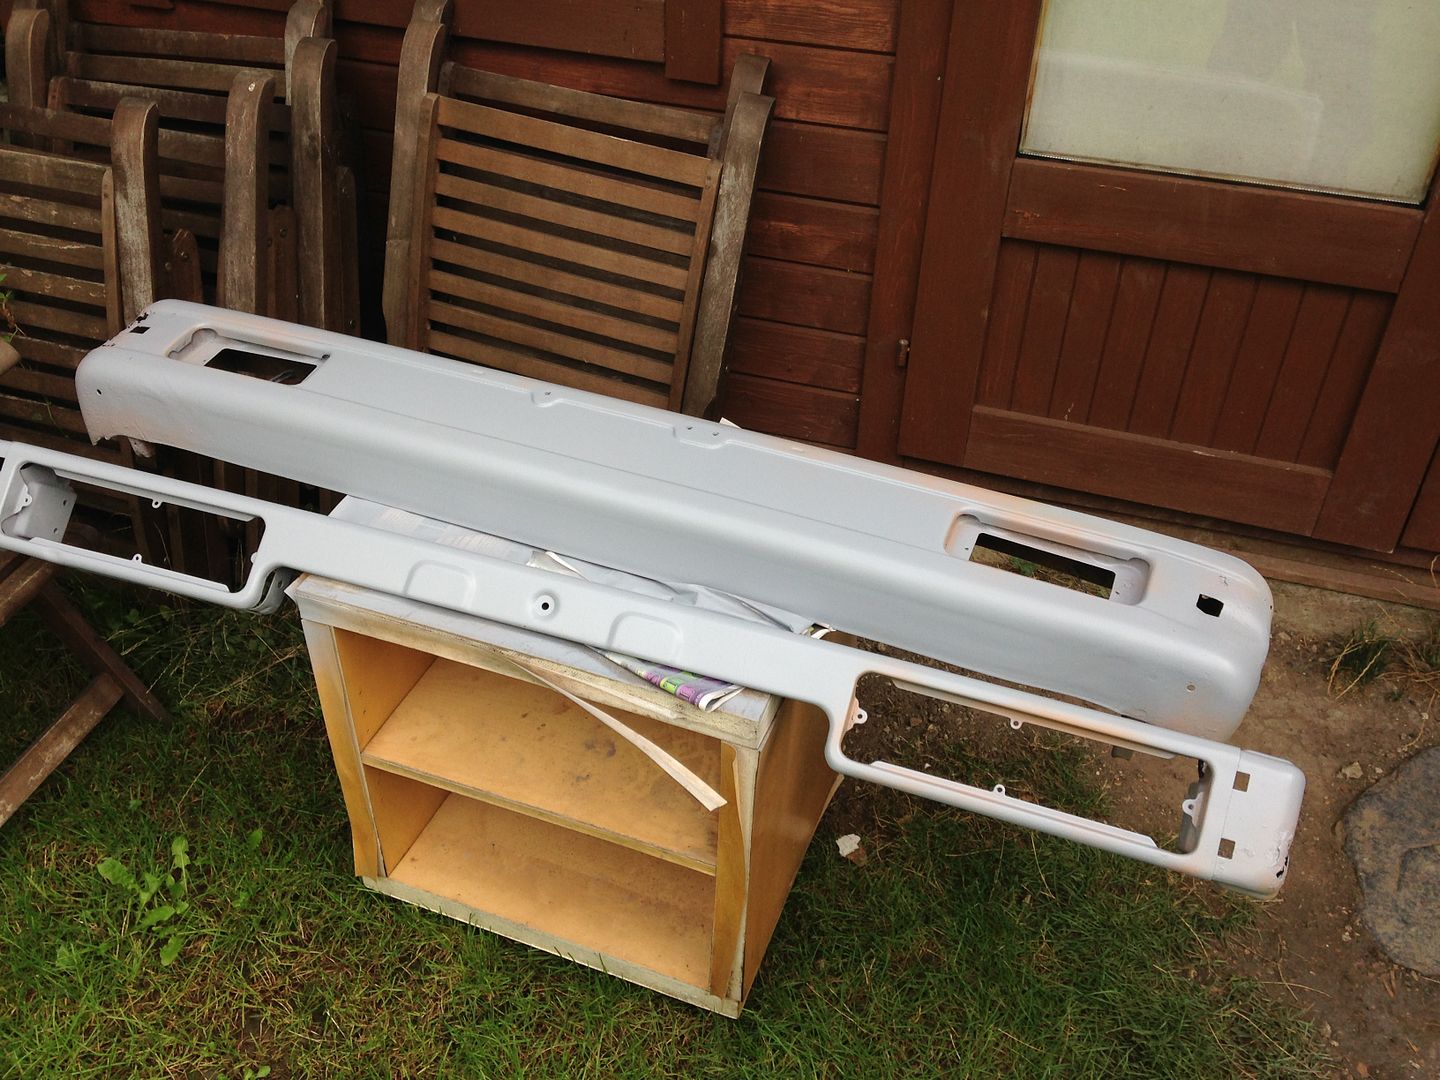
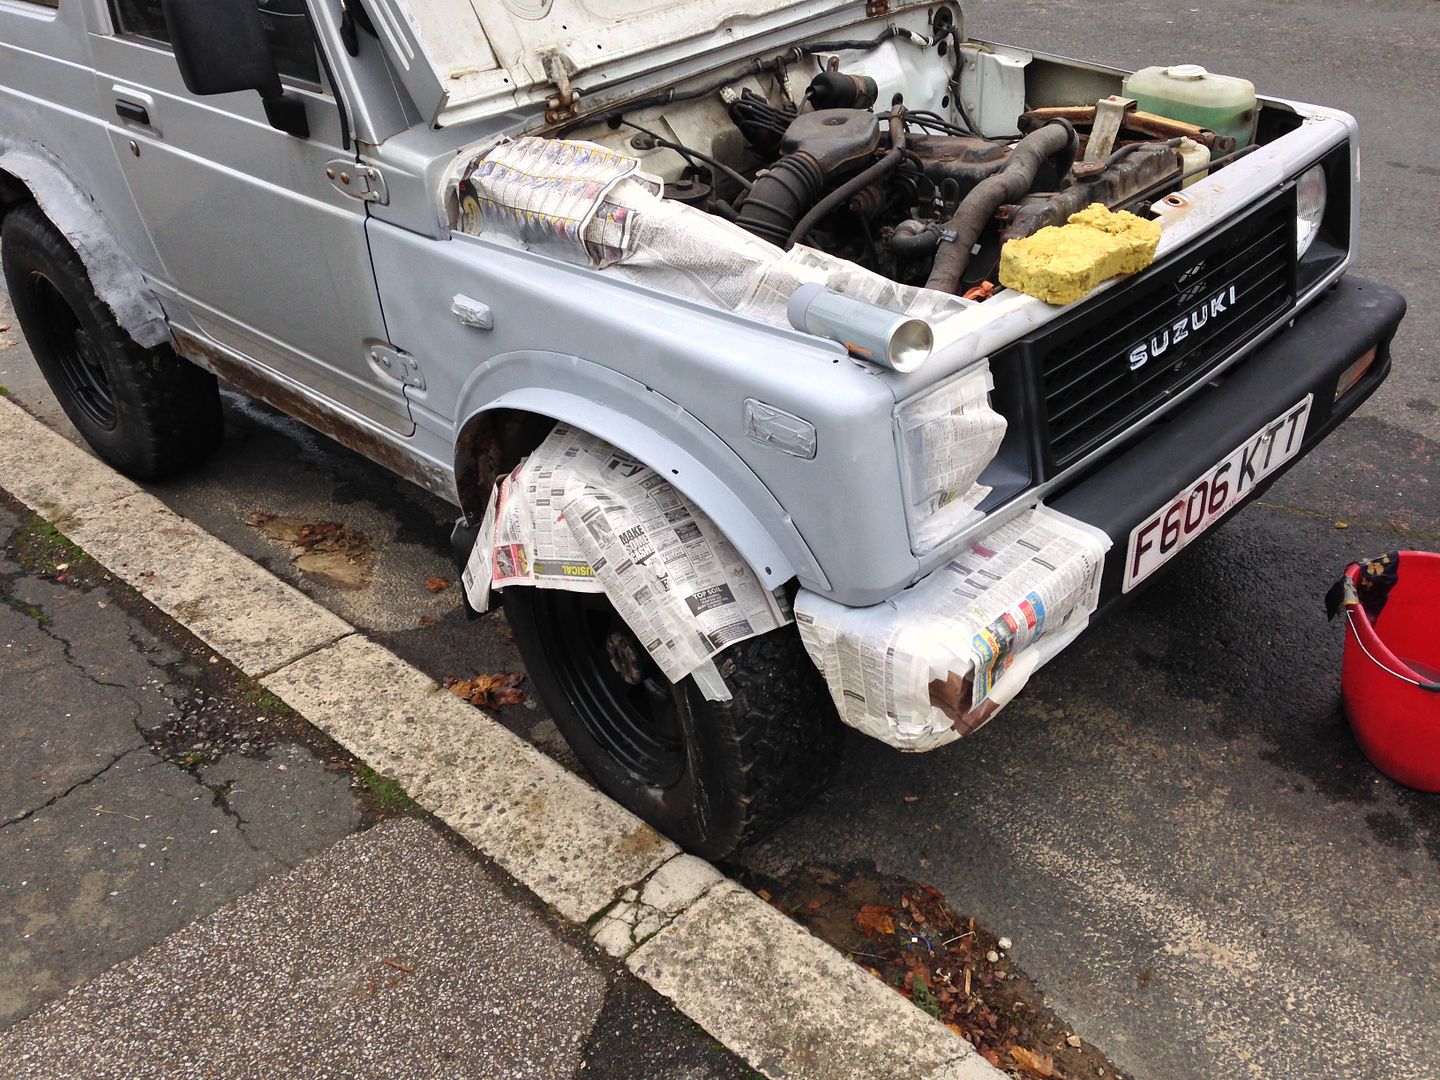
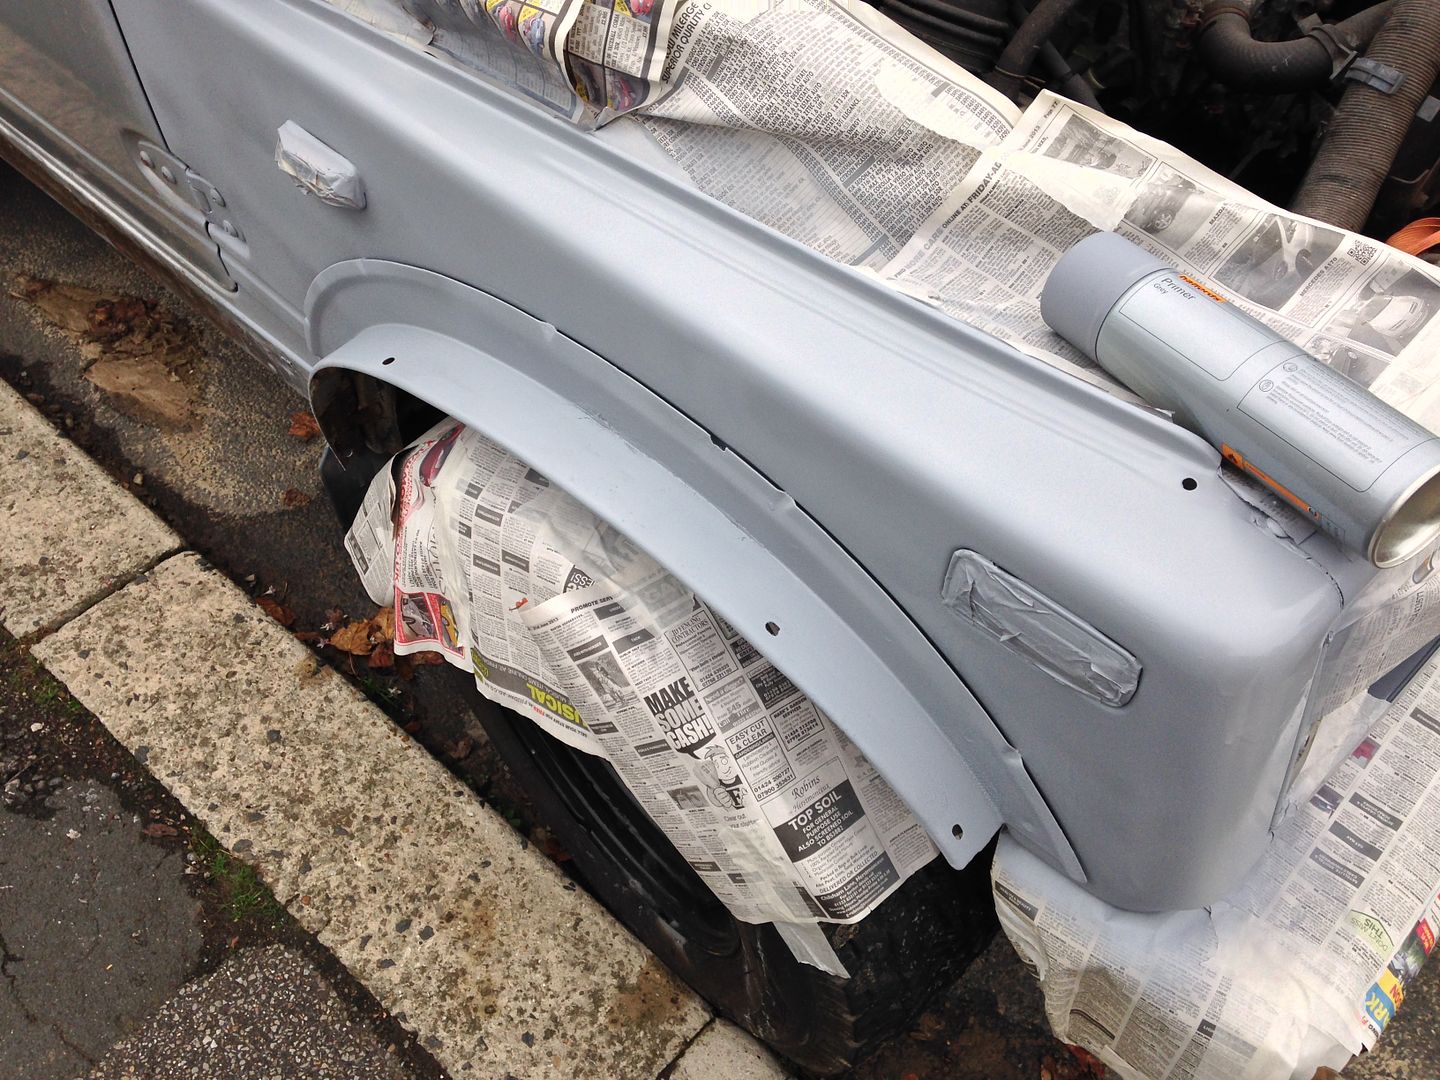
First things first, off with the bumpers !
bit of a rub down and plastic primer for the ends and a massive rub down and some repairs needed for the metal bits.
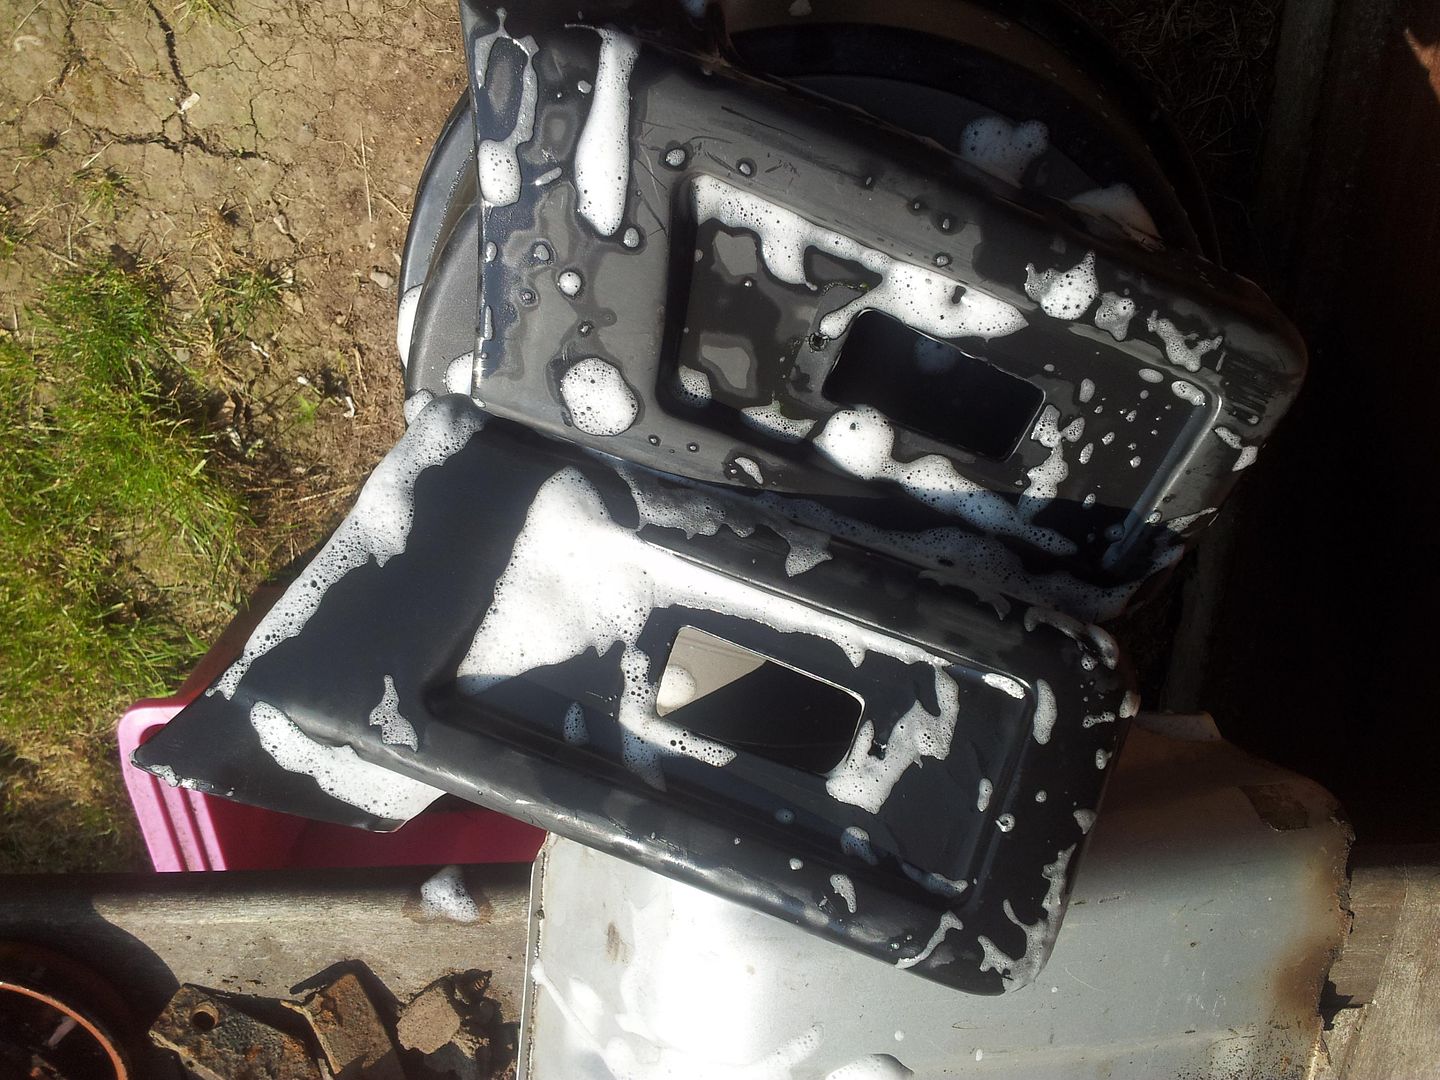
a few nicks left in the bumper ends but I have run out of plastic primer so a bit of patience for those
 |
|
| Back to top |
|
|
me and the wife
*******
Joined: 07 Aug 2007
Posts: 1013
Location: gosport
|
| Posted: Tue Jul 16, 2013 10:32 Post subject: |
|
|
| i love watching peoples builds, i always forget to take pics of mine when im doing bits to it |
|
| Back to top |
|
|
Nejtun
*
Joined: 10 Jul 2011
Posts: 43
Location: Hastings
|
| Posted: Thu Jul 18, 2013 5:34 Post subject: |
|
|
| I promised myself I would keep a record this time, so its all about the photos |
|
| Back to top |
|
|
Nejtun
*
Joined: 10 Jul 2011
Posts: 43
Location: Hastings
|
| Posted: Thu Jul 18, 2013 5:50 Post subject: |
|
|
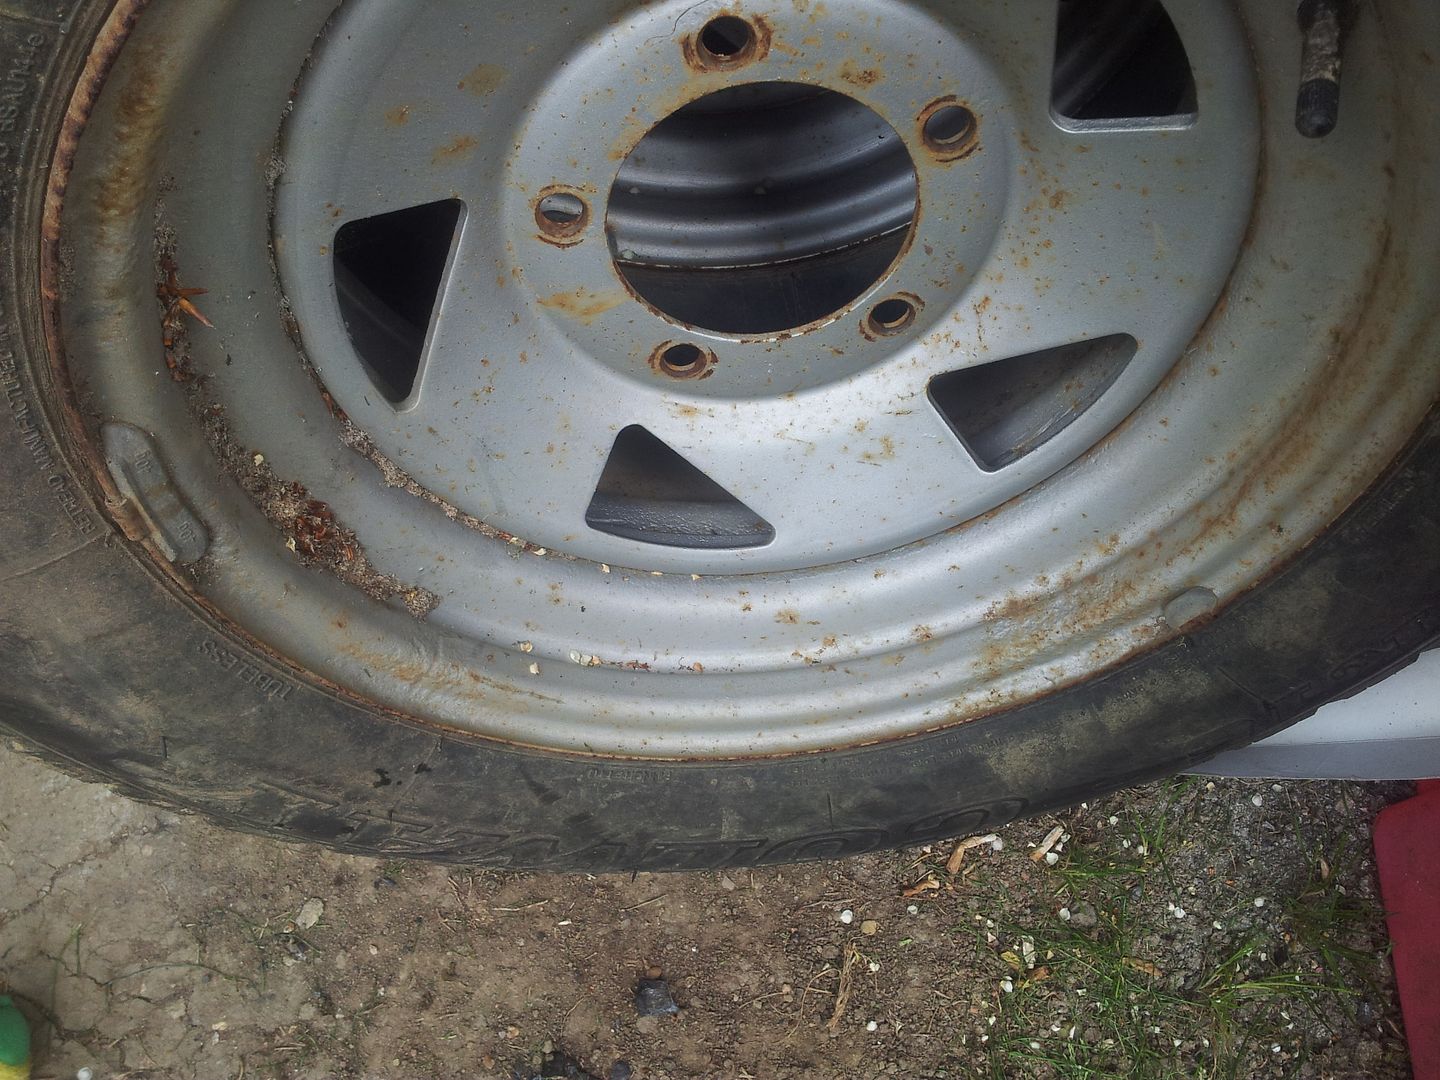
I got a spare set of chunky wheels and tyres with the car, slightly ugly wheels but they fill the arches better than the standard ones and give a much more stable ride. Not in very good condition though so time for some 240 grit wet and dry.
whipped the valves out and squeezed some newspaper down the sides ( cheapest masking paper in the world!)
then a couple of layers of primer.
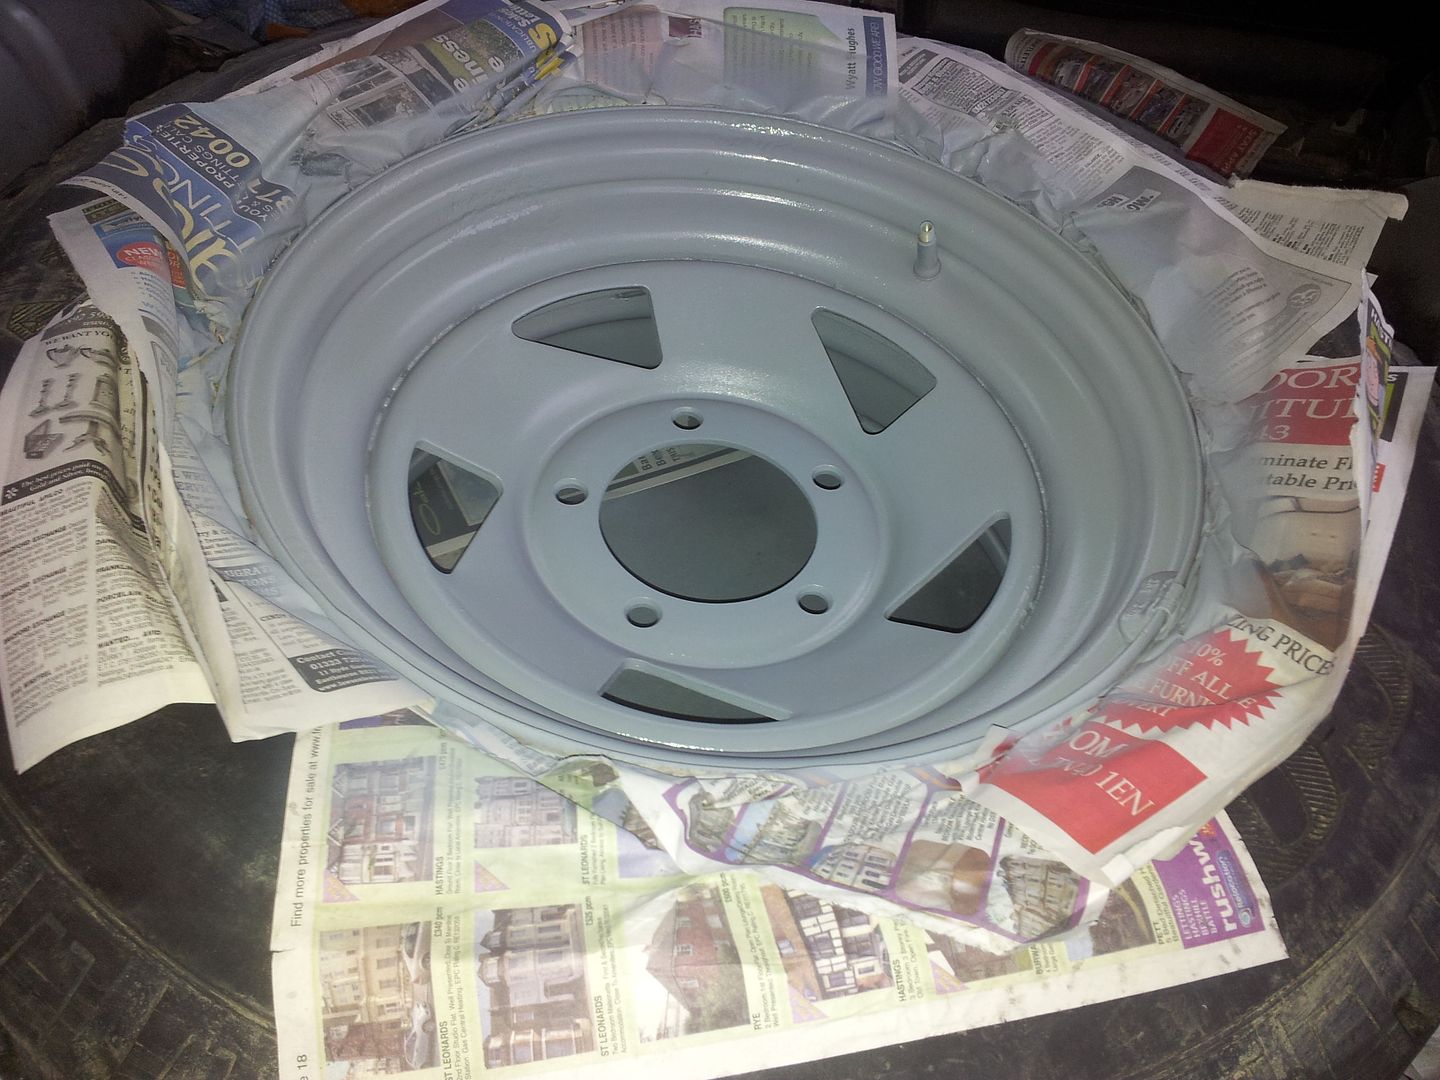
a day to let that go off then a couple of layers of black gloss, trying to avoid any runny drippy bits.
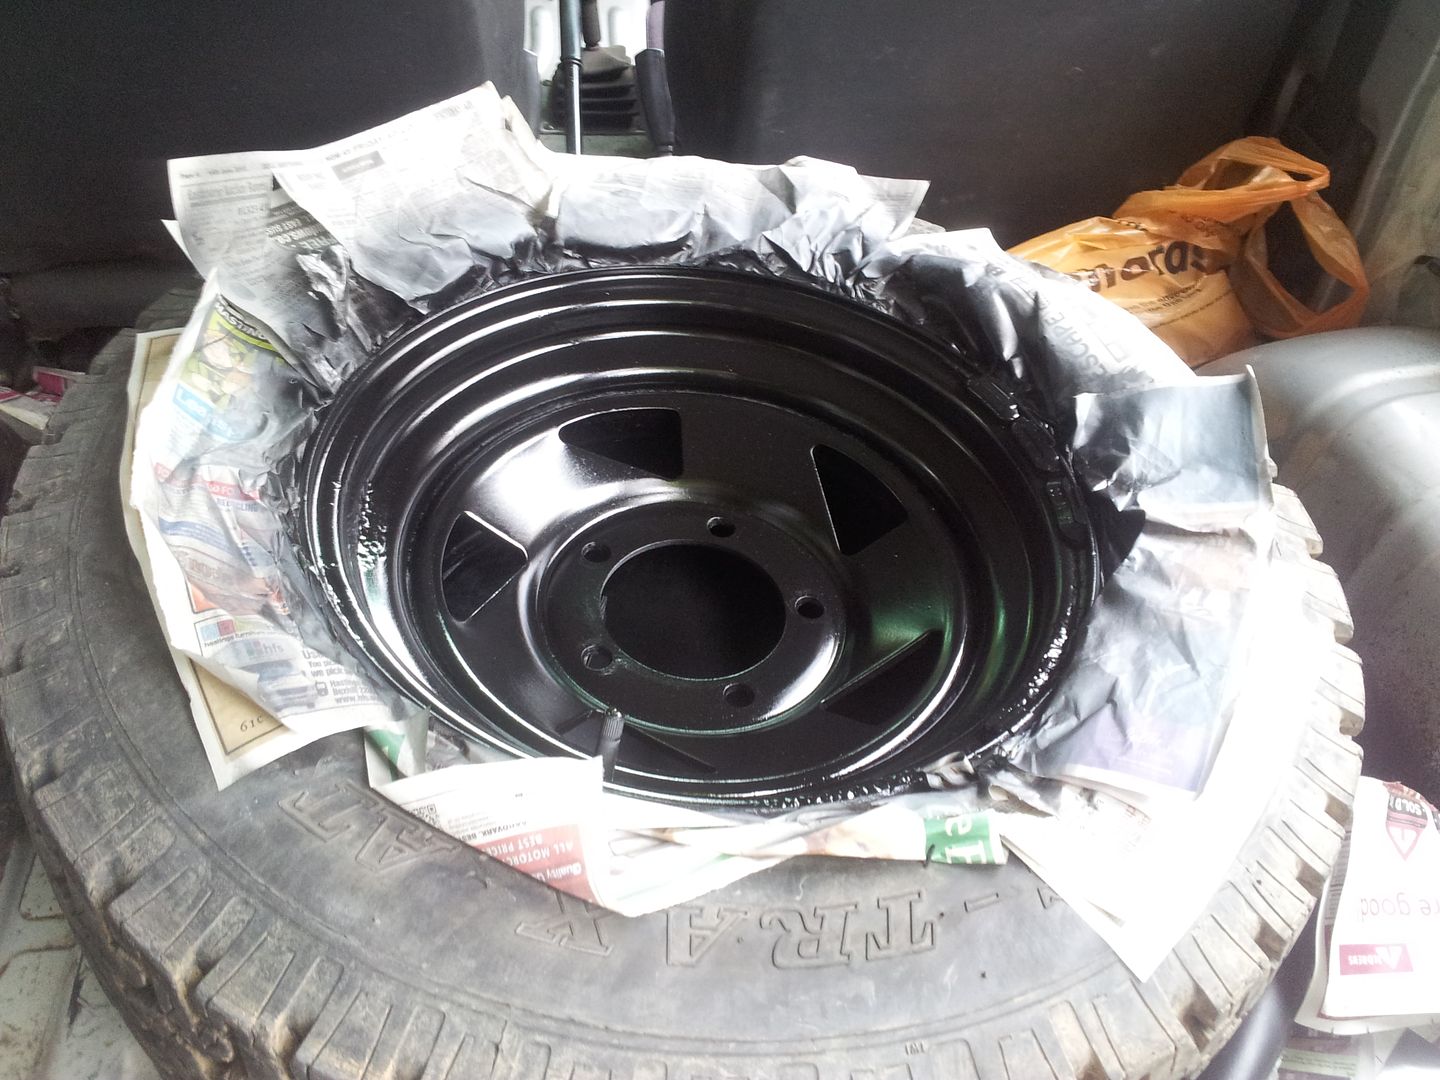
using the back of the SJ as my spray booth as it is always dry and dust free !
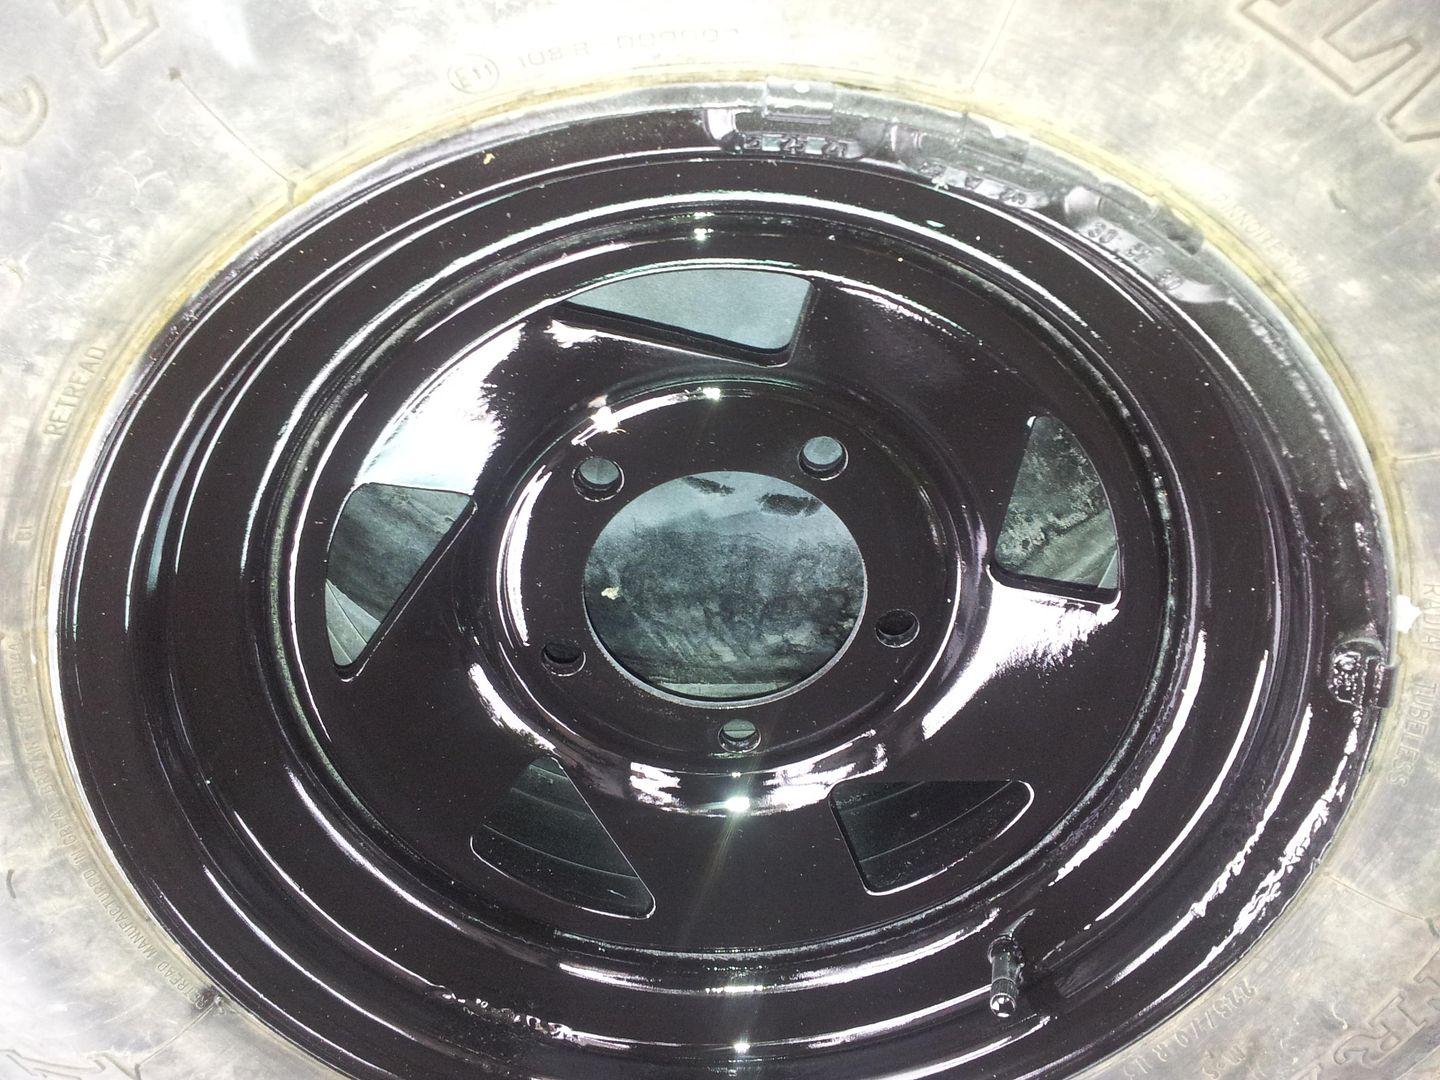
24 hours later , a couple of layers of lacquer and the wheels look a bit better, probably could have got rid of a few more lumps and bumps but I am not of fan of this wheel pattern at all so not really worth wasting extra materials.
little bit of overspray once i took the masking paper off but no biggie
a quick application of "Poorboys trim and tyre restorer" and the tyres look nice and shiny for a couple of months .
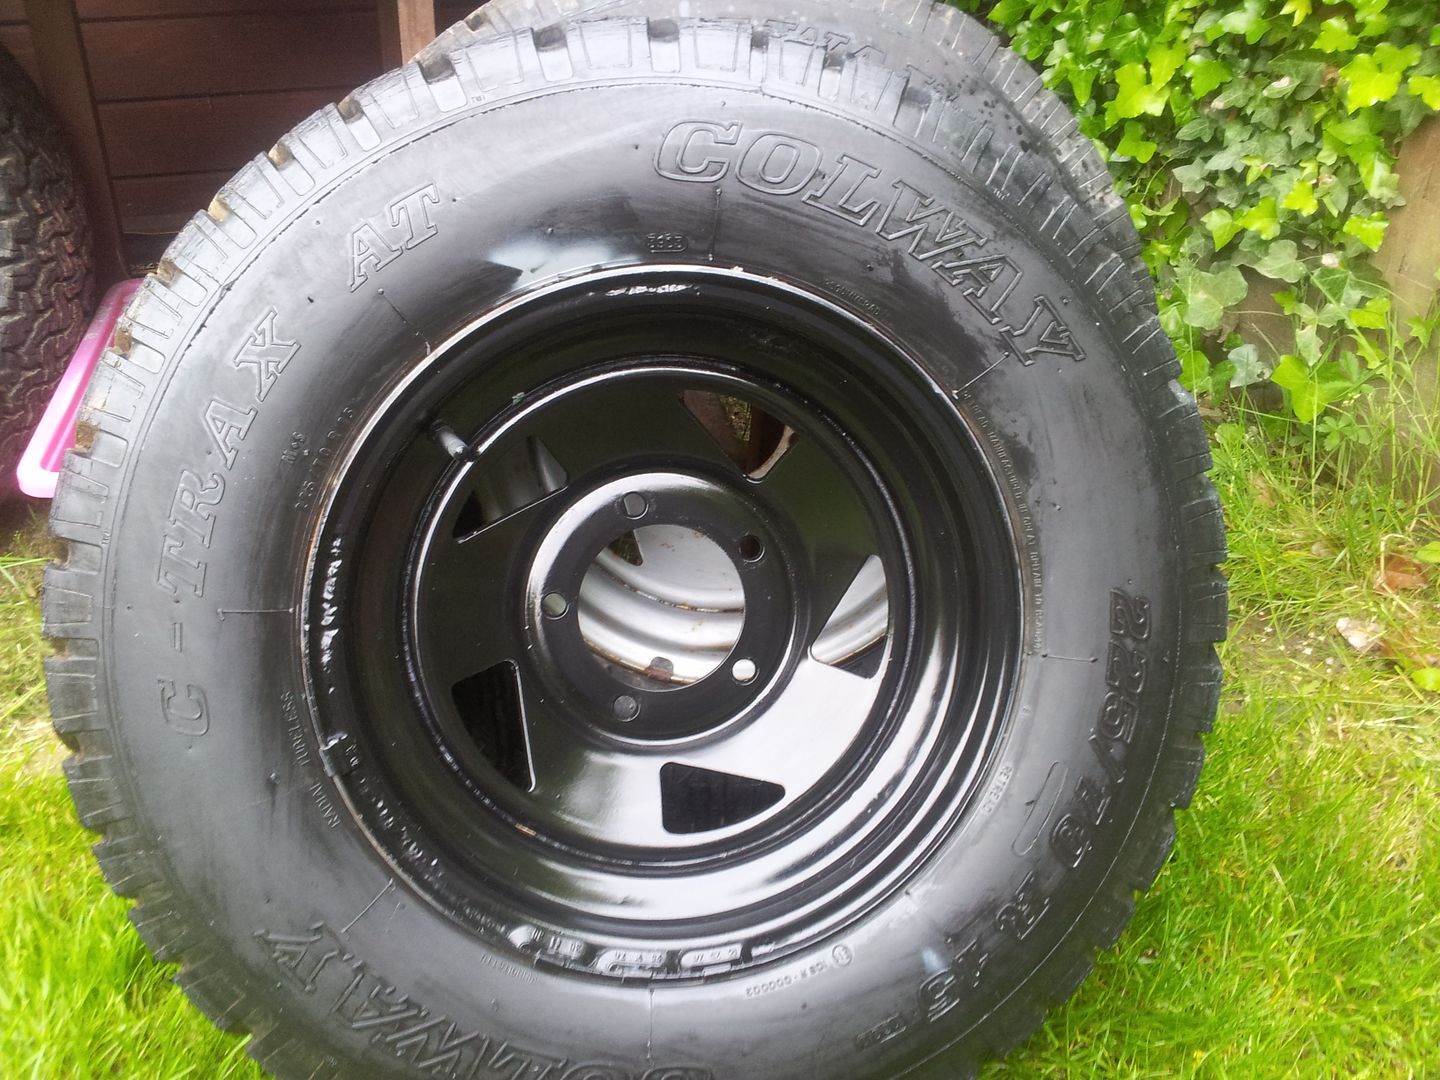
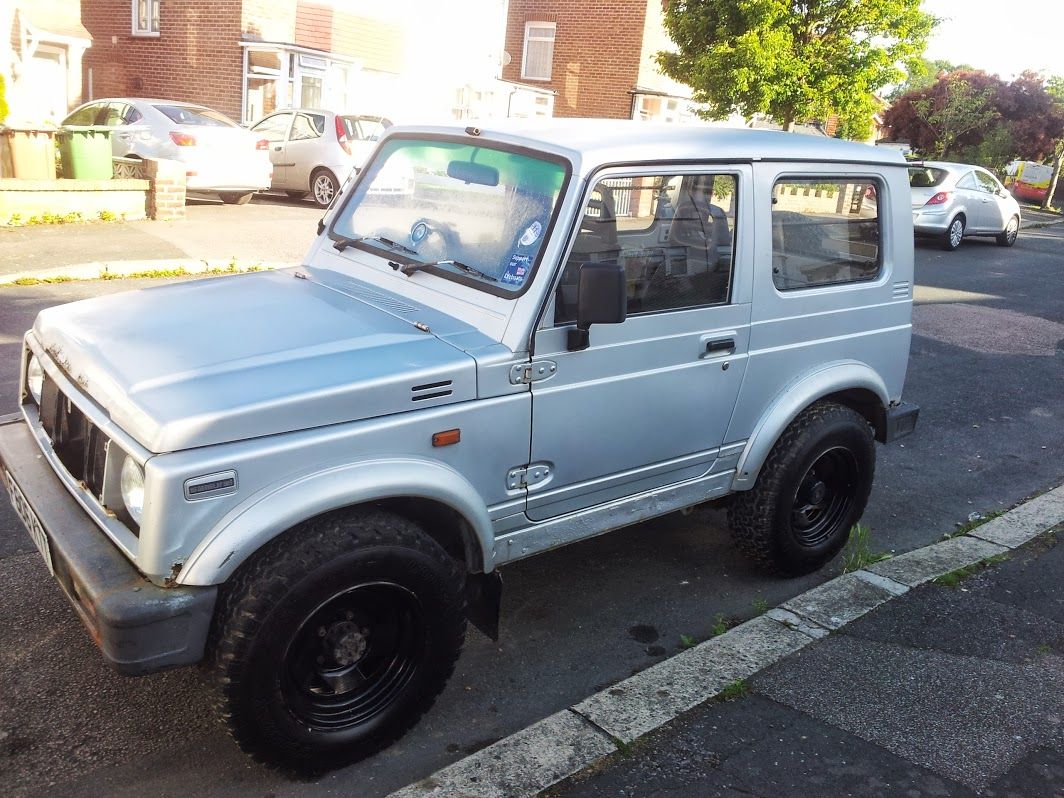
newly painted wheels on the car just for a quick look ( i am so impatient !)
 |
|
| Back to top |
|
|
Nejtun
*
Joined: 10 Jul 2011
Posts: 43
Location: Hastings
|
| Posted: Tue Oct 01, 2013 7:24 Post subject: |
|
|
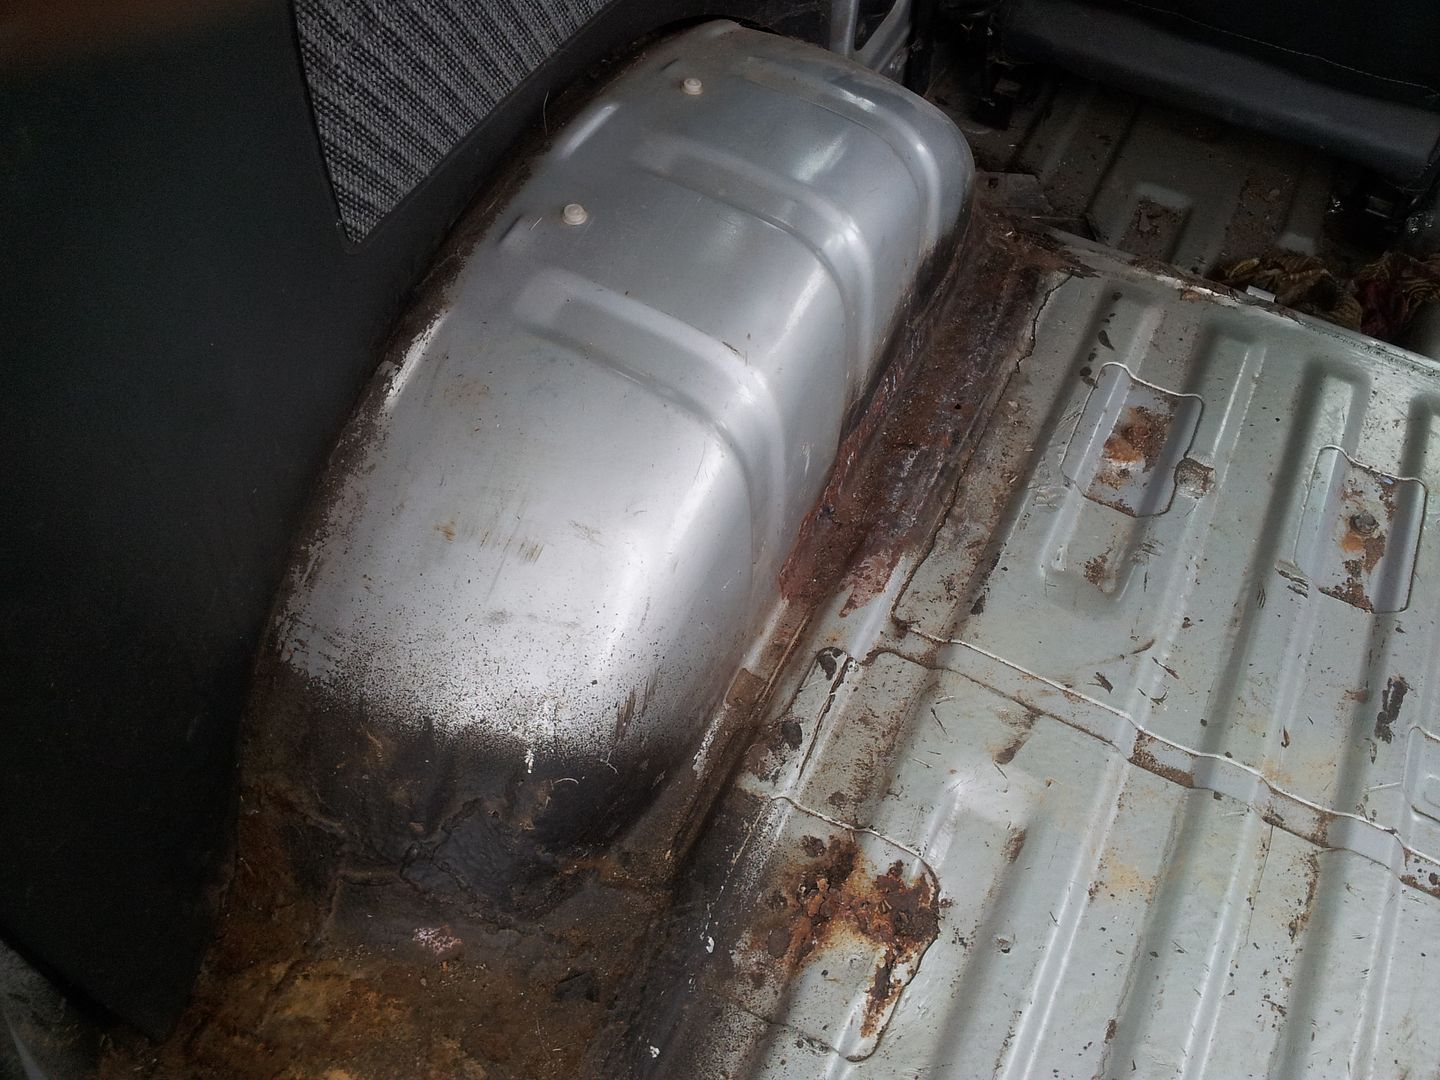
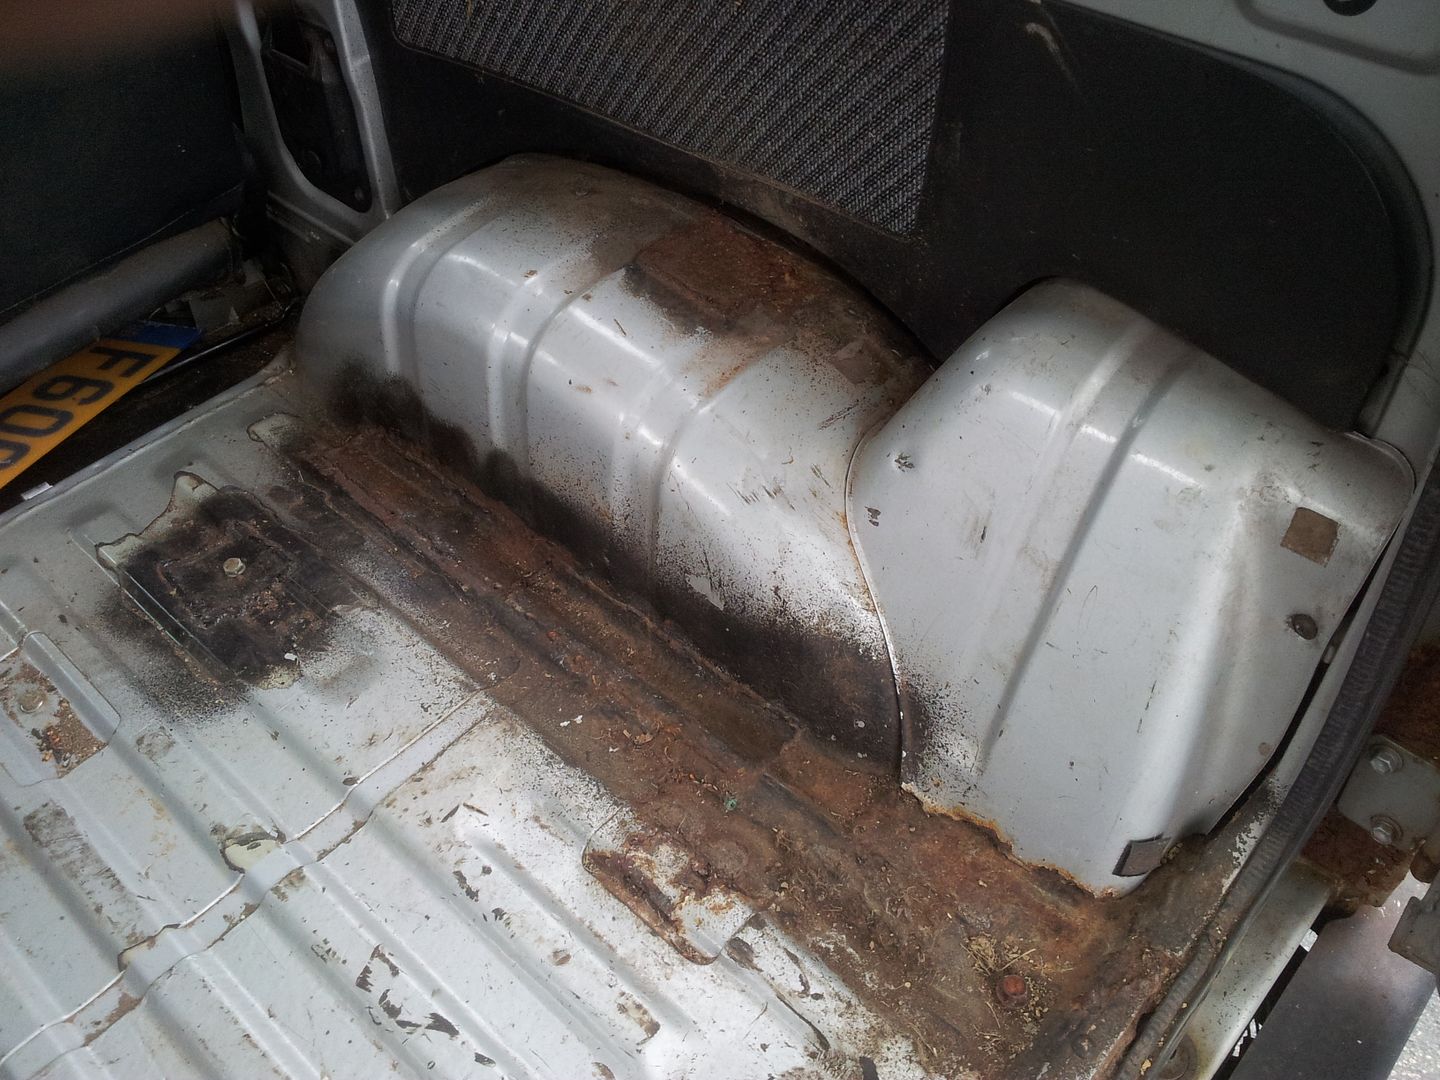
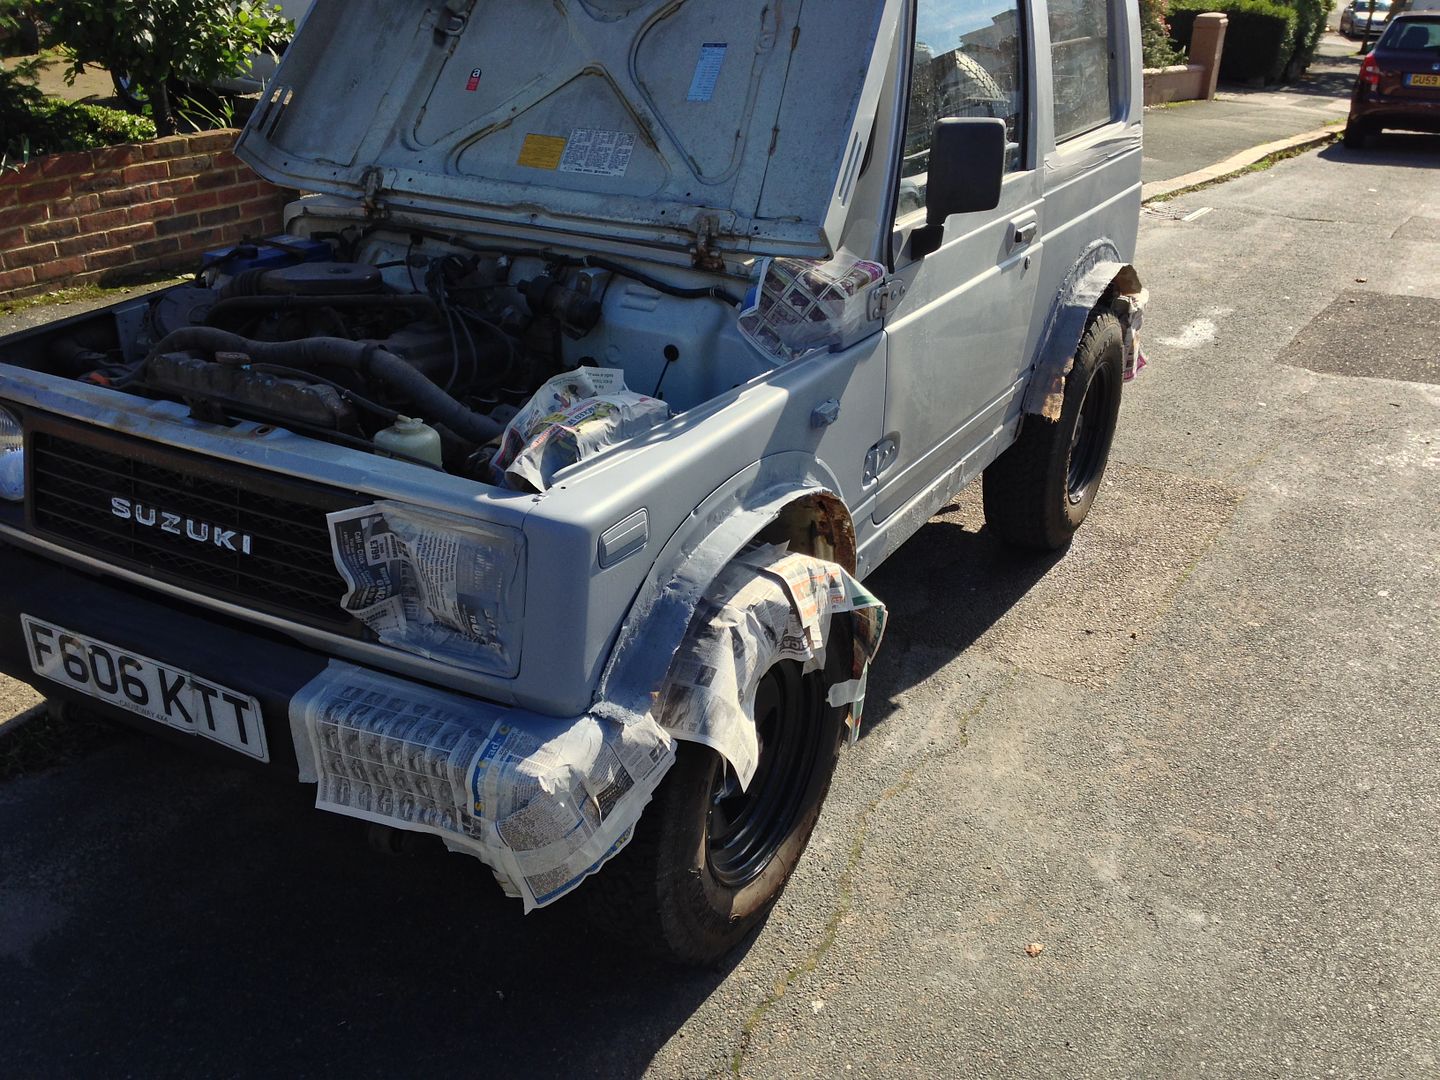
Ok so I have done some more to this troublemaker!
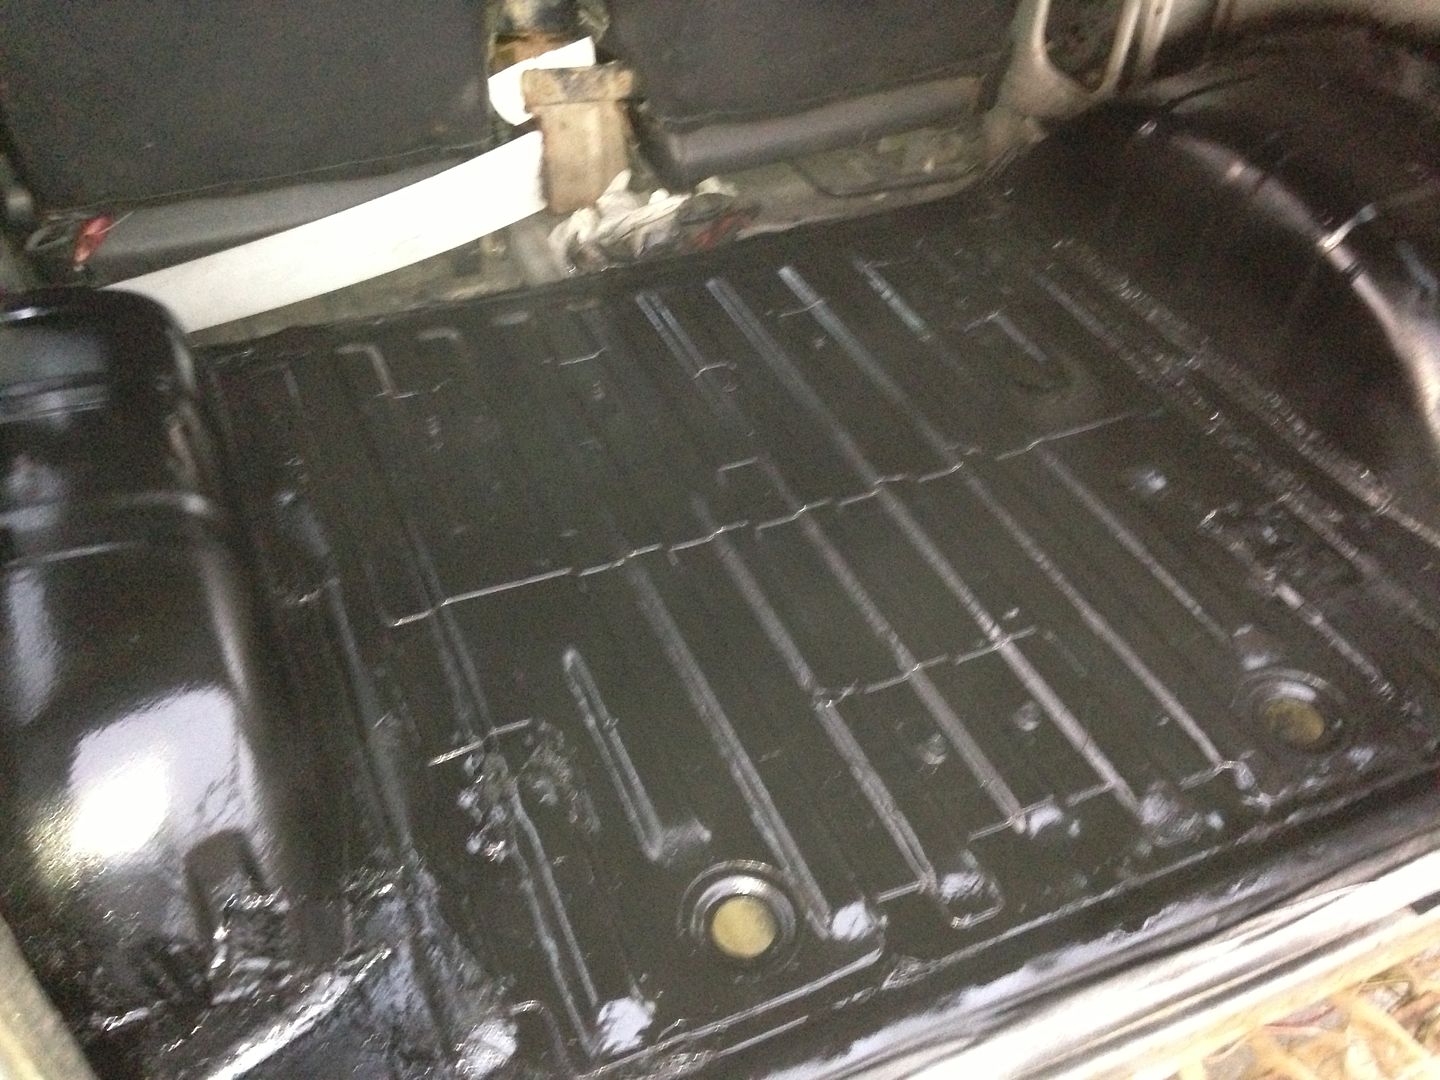
Sprayed the rear interior with halfords truck bed liner
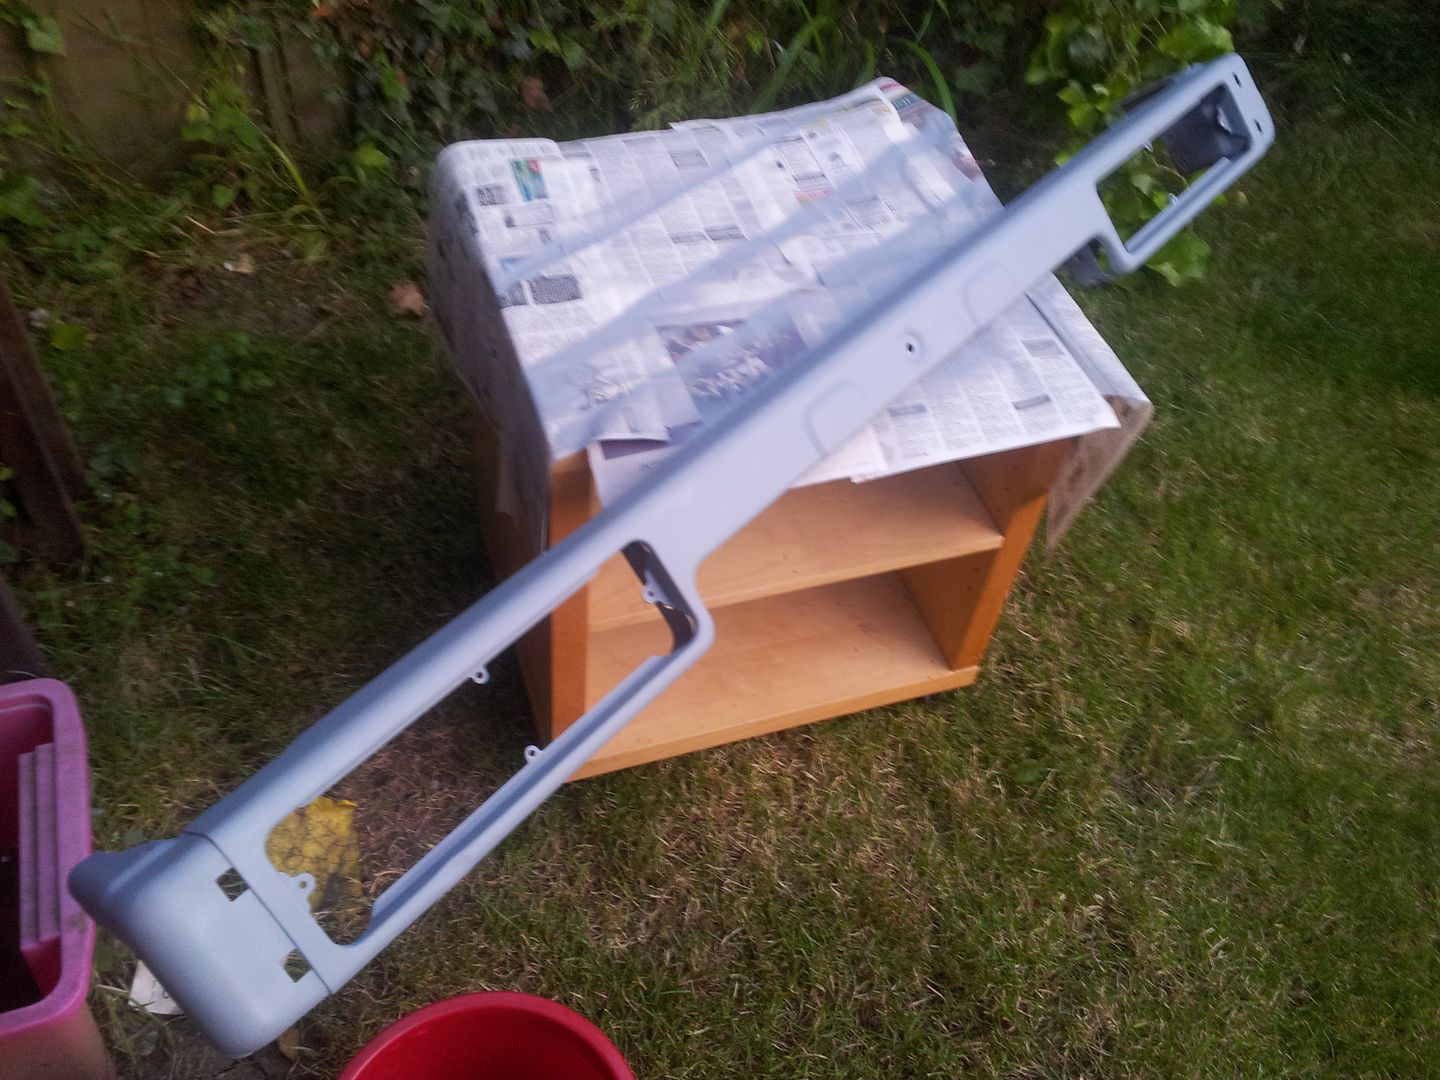
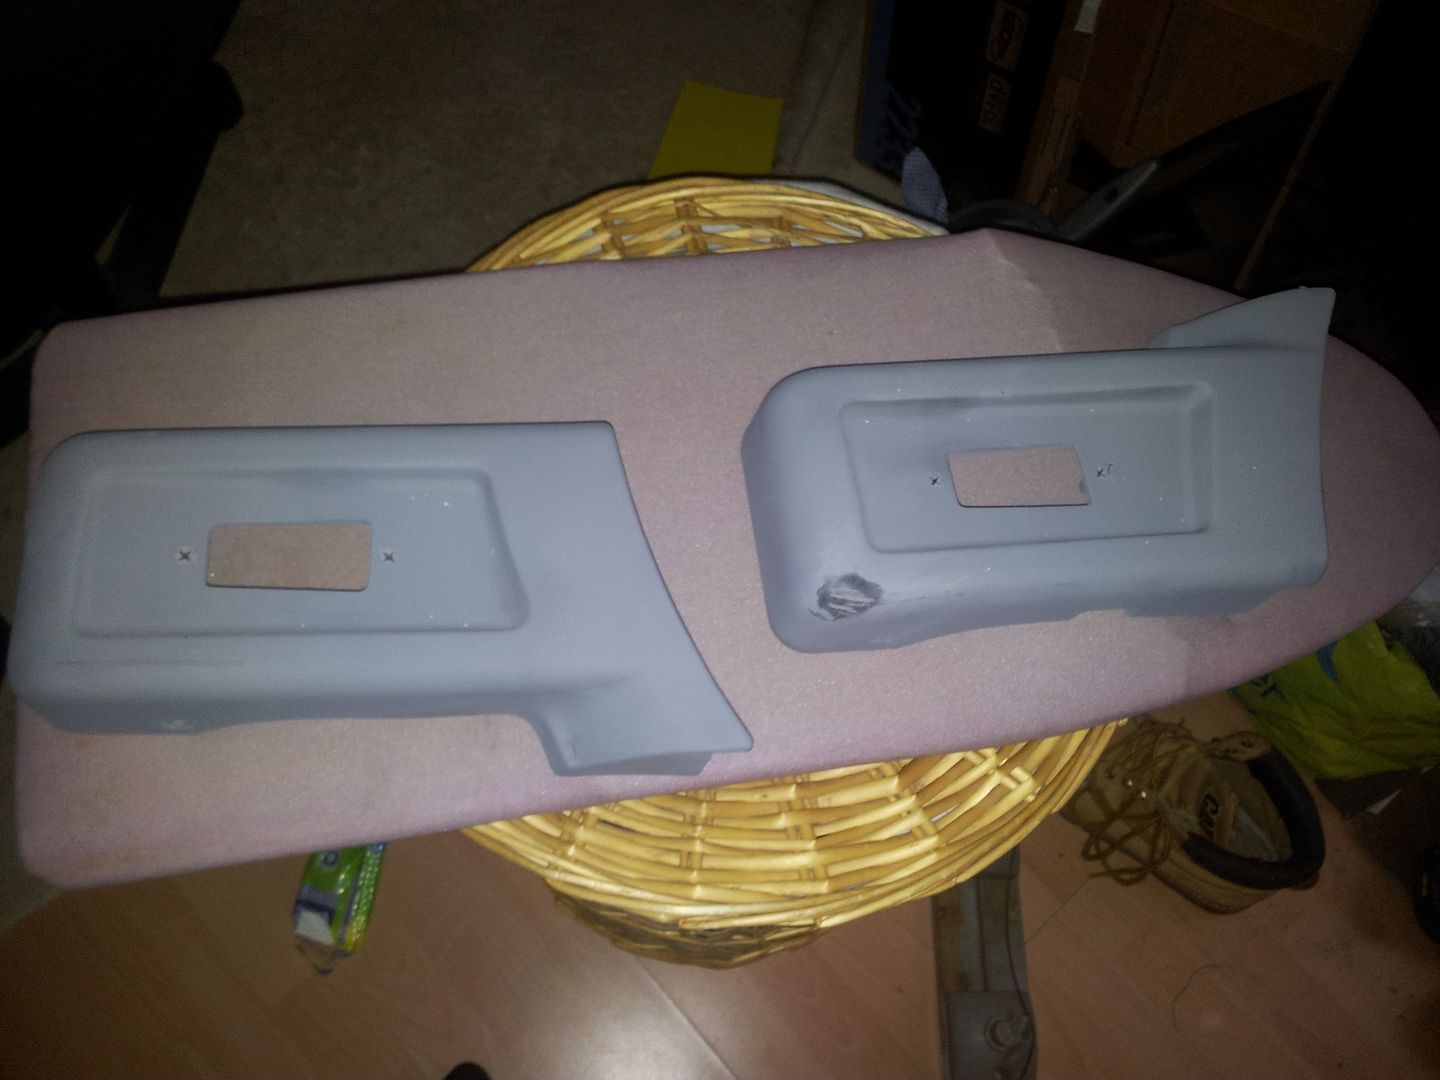
bit of primer and a rub down on the bumpers until i can get some decent aftermarket versions
masked and sprayed the badges while they were out of the wings so i didnt have to do them later !
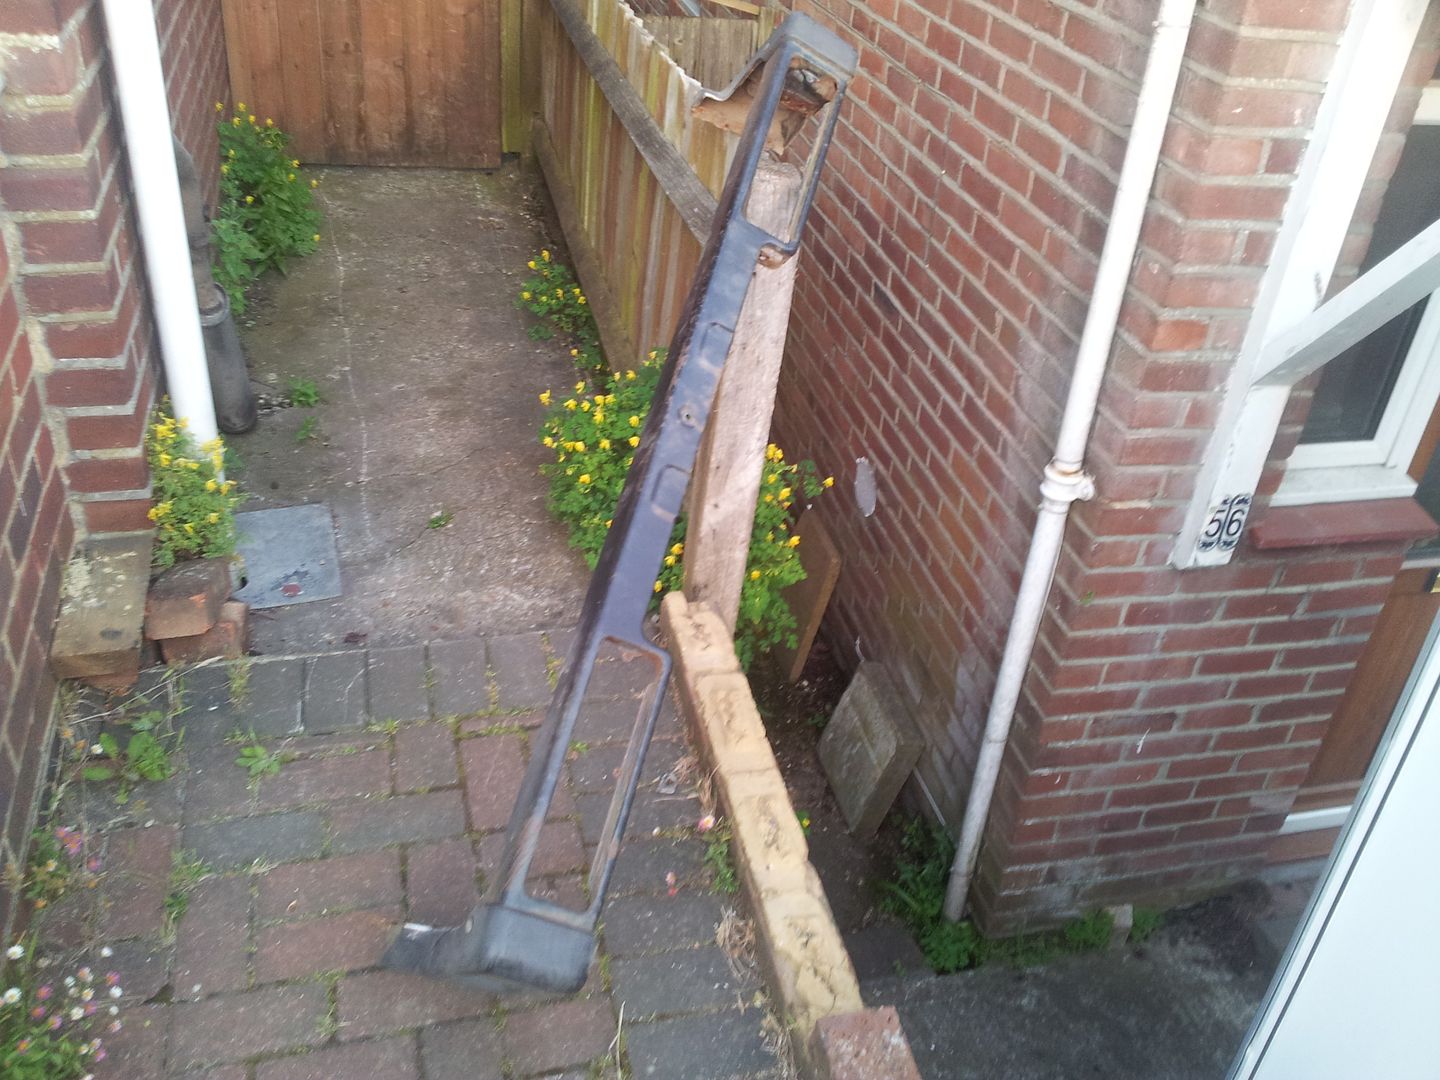
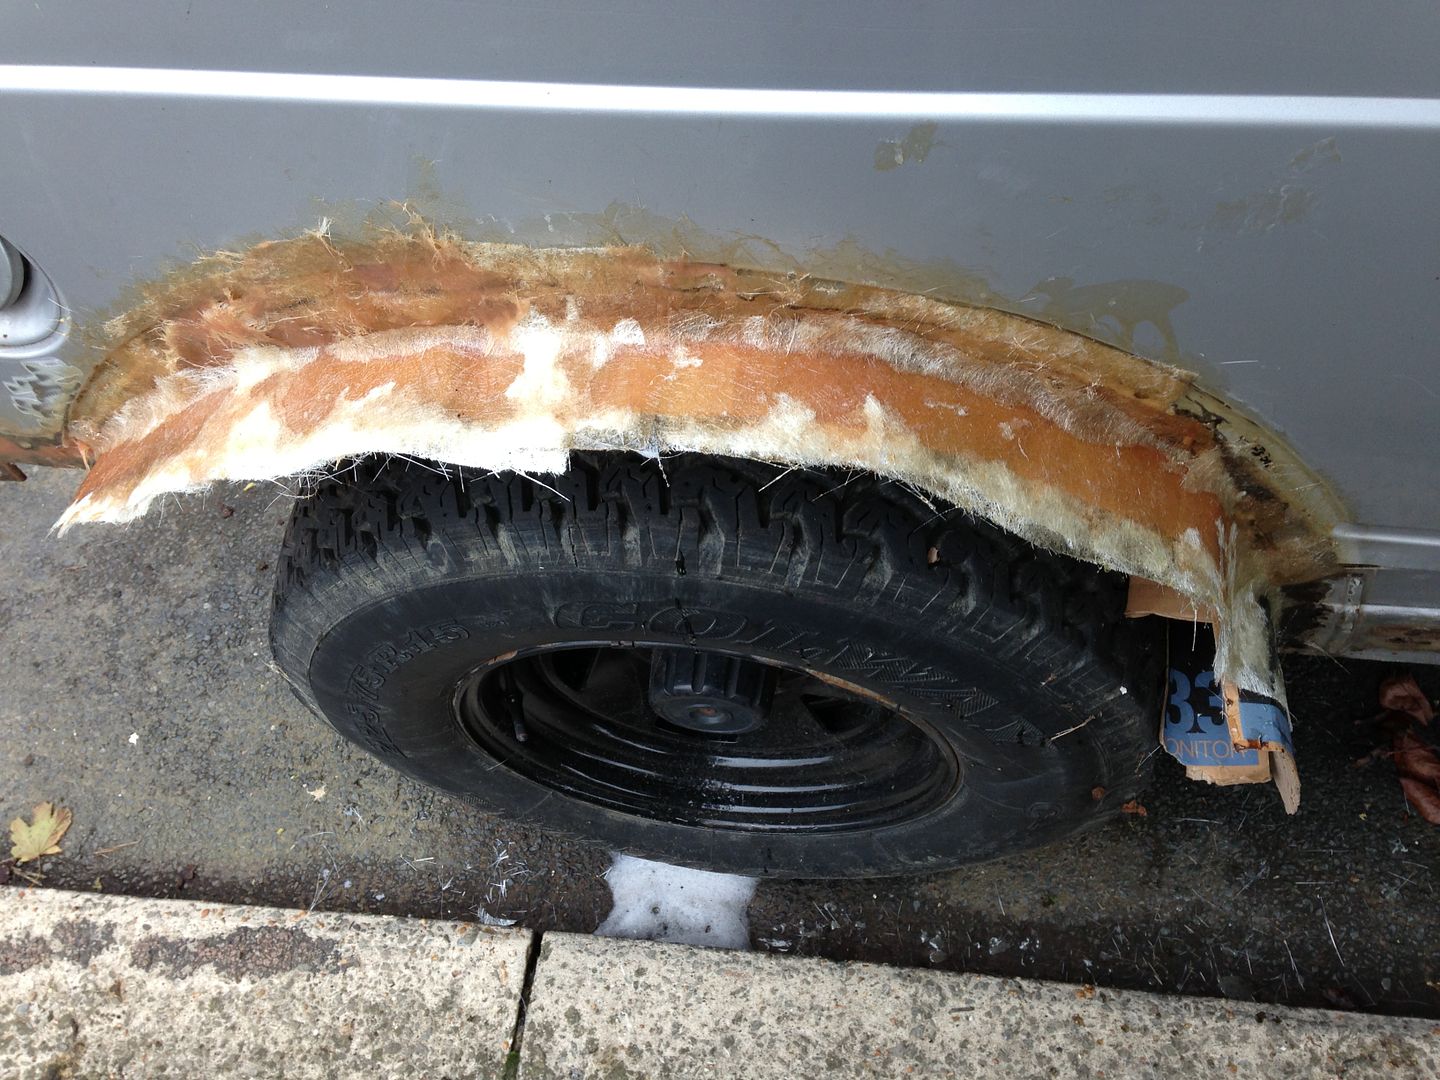
the start of the rebuild of the rear under arch bits , fibre glass instead of rotting tin will do the job here, still not sure which wheel arches to cover this with
Last edited by Nejtun on Wed Oct 02, 2013 7:10; edited 1 time in total |
|
| Back to top |
|
|
Nejtun
*
Joined: 10 Jul 2011
Posts: 43
Location: Hastings
|
| Posted: Wed Oct 02, 2013 7:08 Post subject: |
|
|
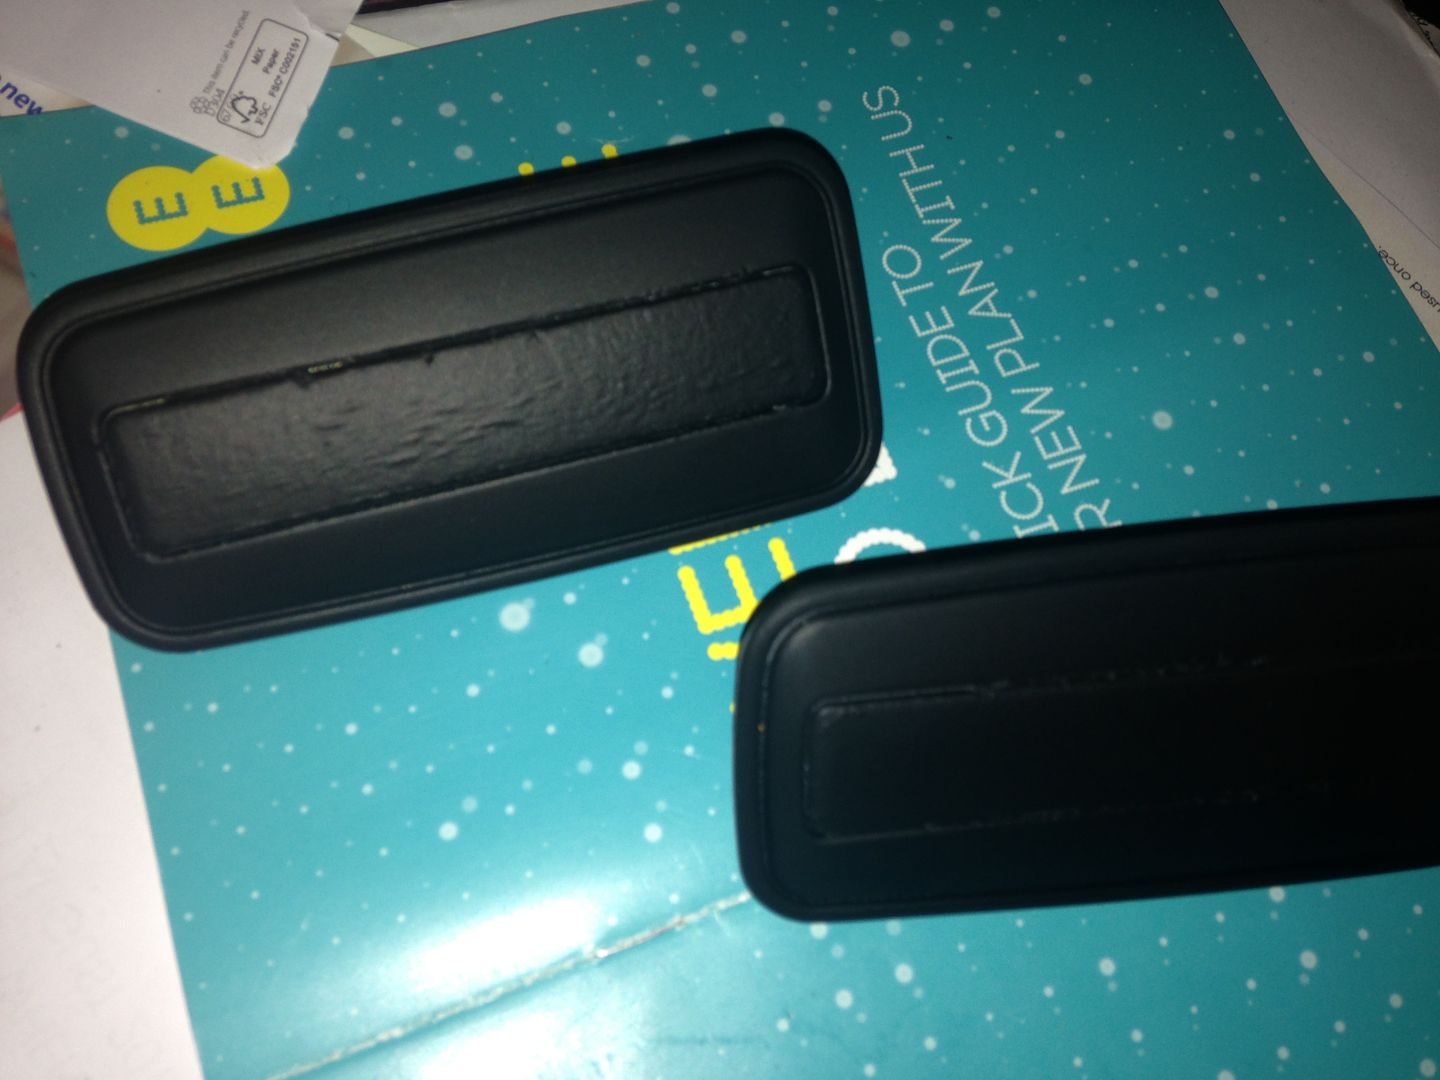
I quite liked the texture of the bedliner , so used the rest up on the bumpers !
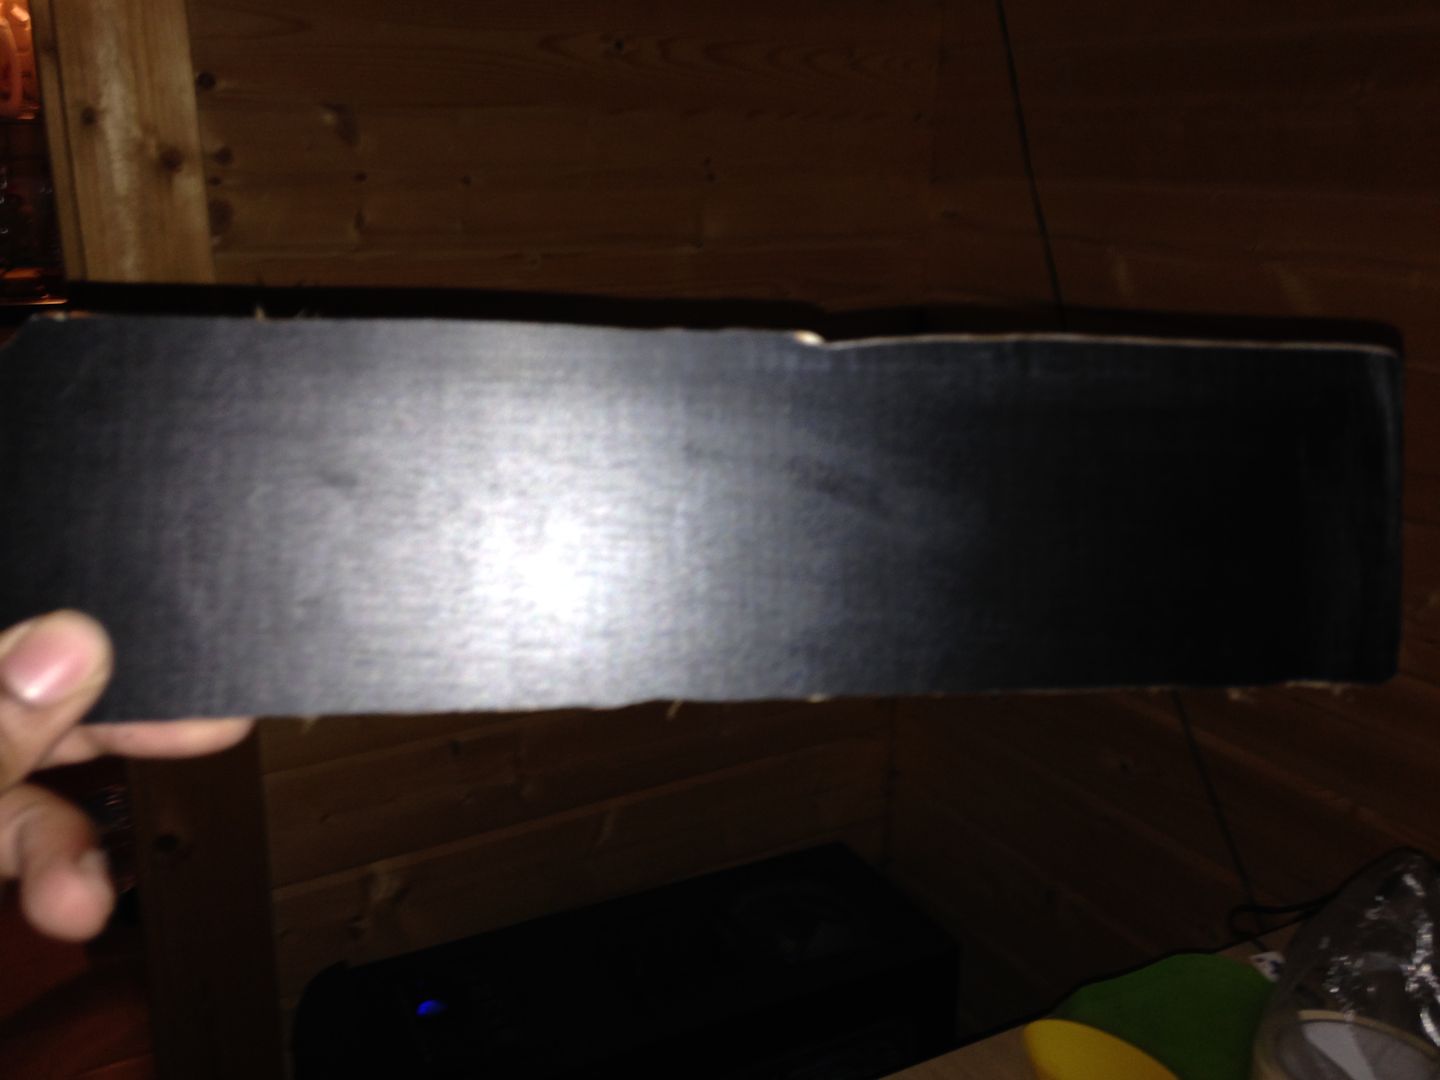
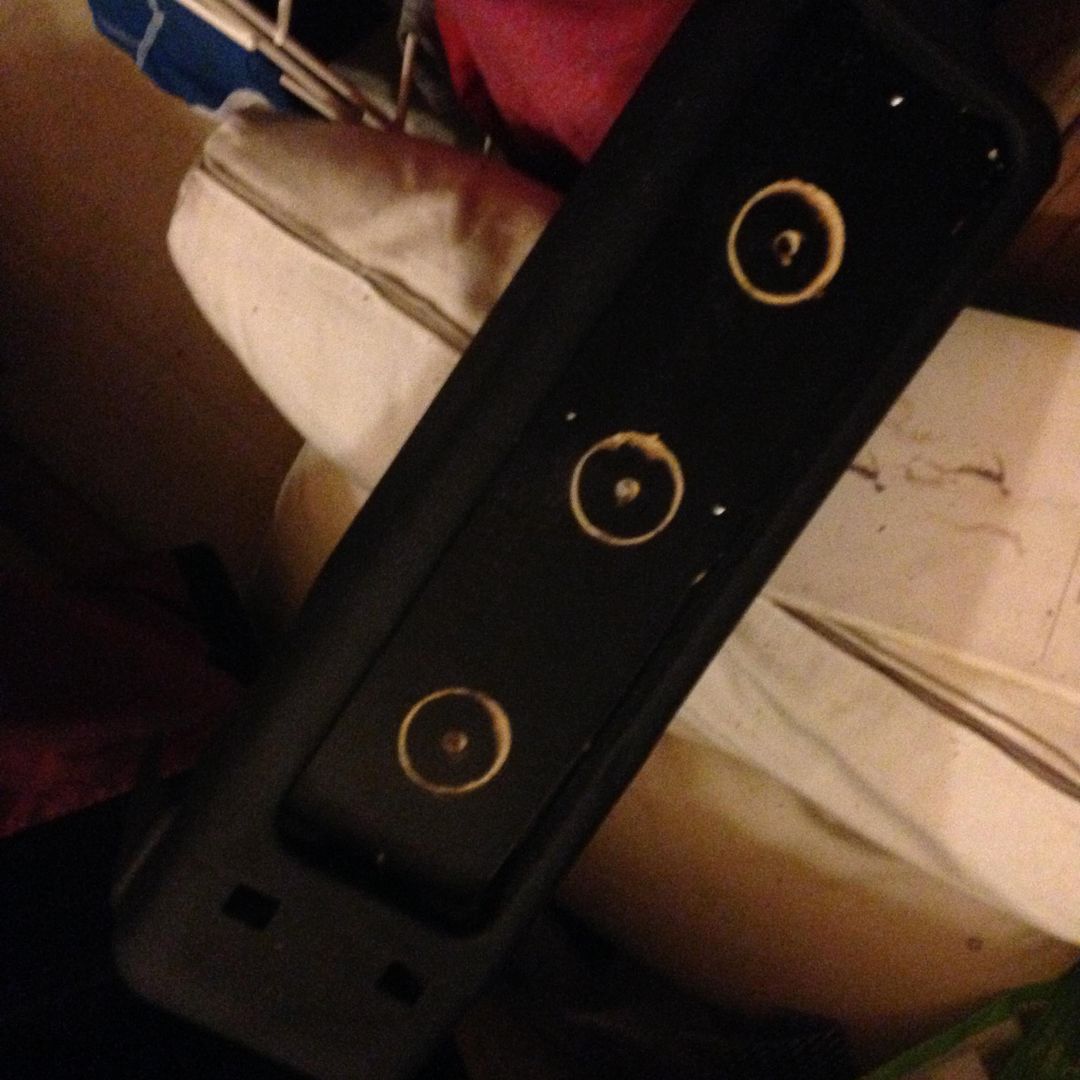
made some temporary backing plates for the lights out of wood, i'll redo them in acrylic when i get some tools to cut it with
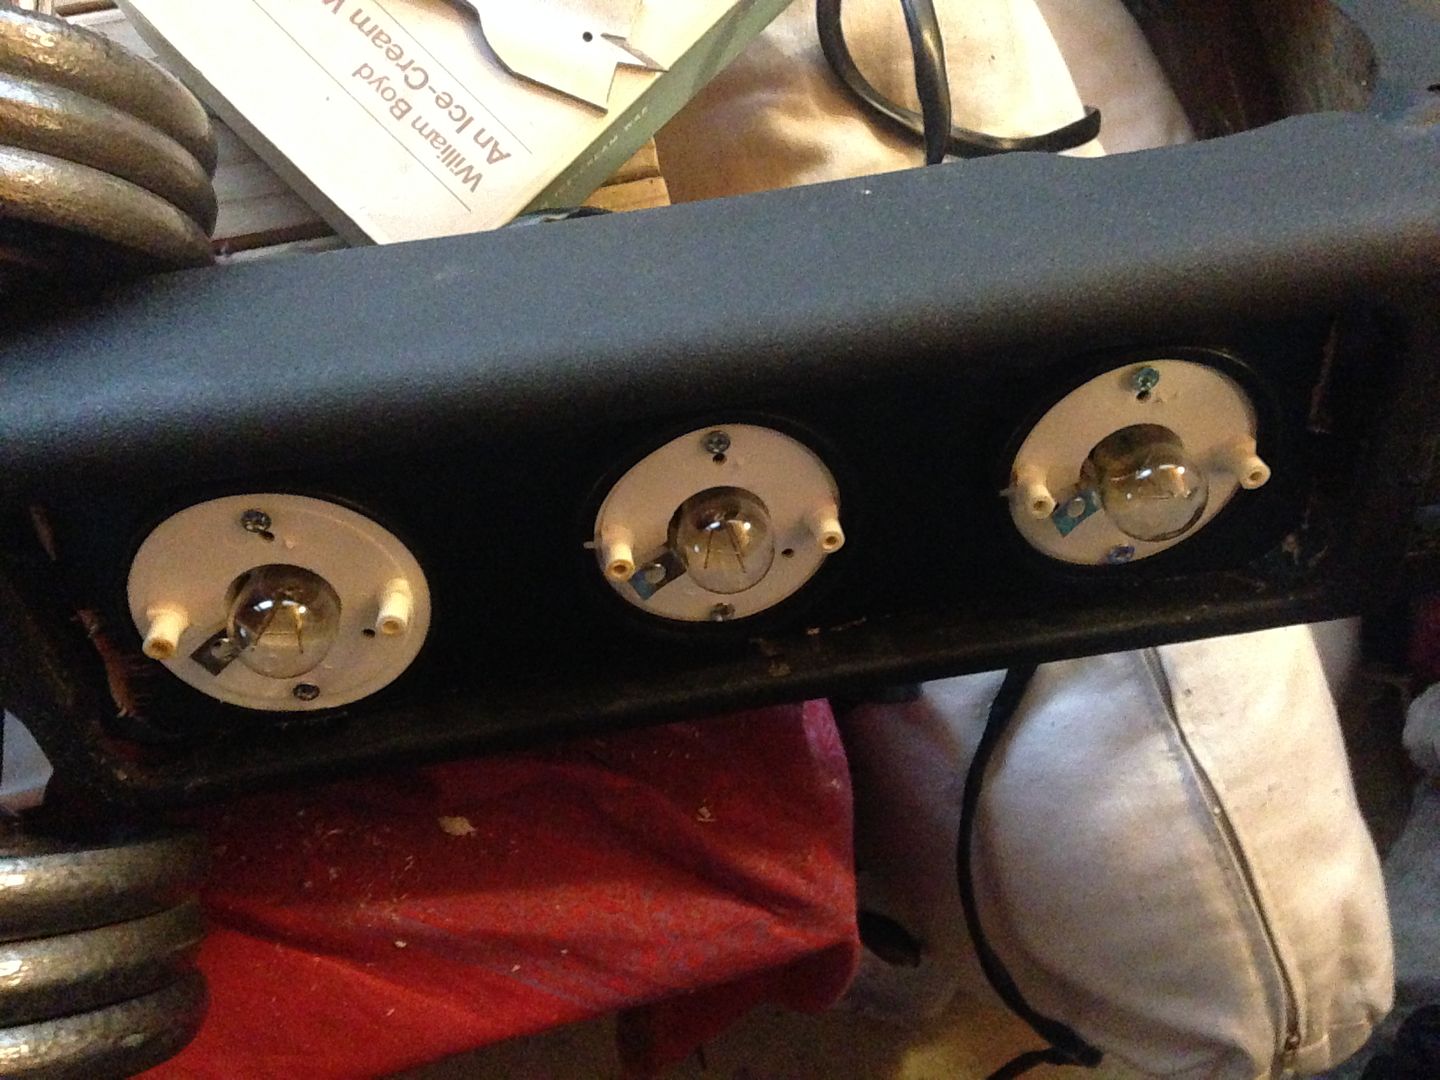
bumpers on and some new earths to get rid of the disco light effect that comes with 25 year old wiring
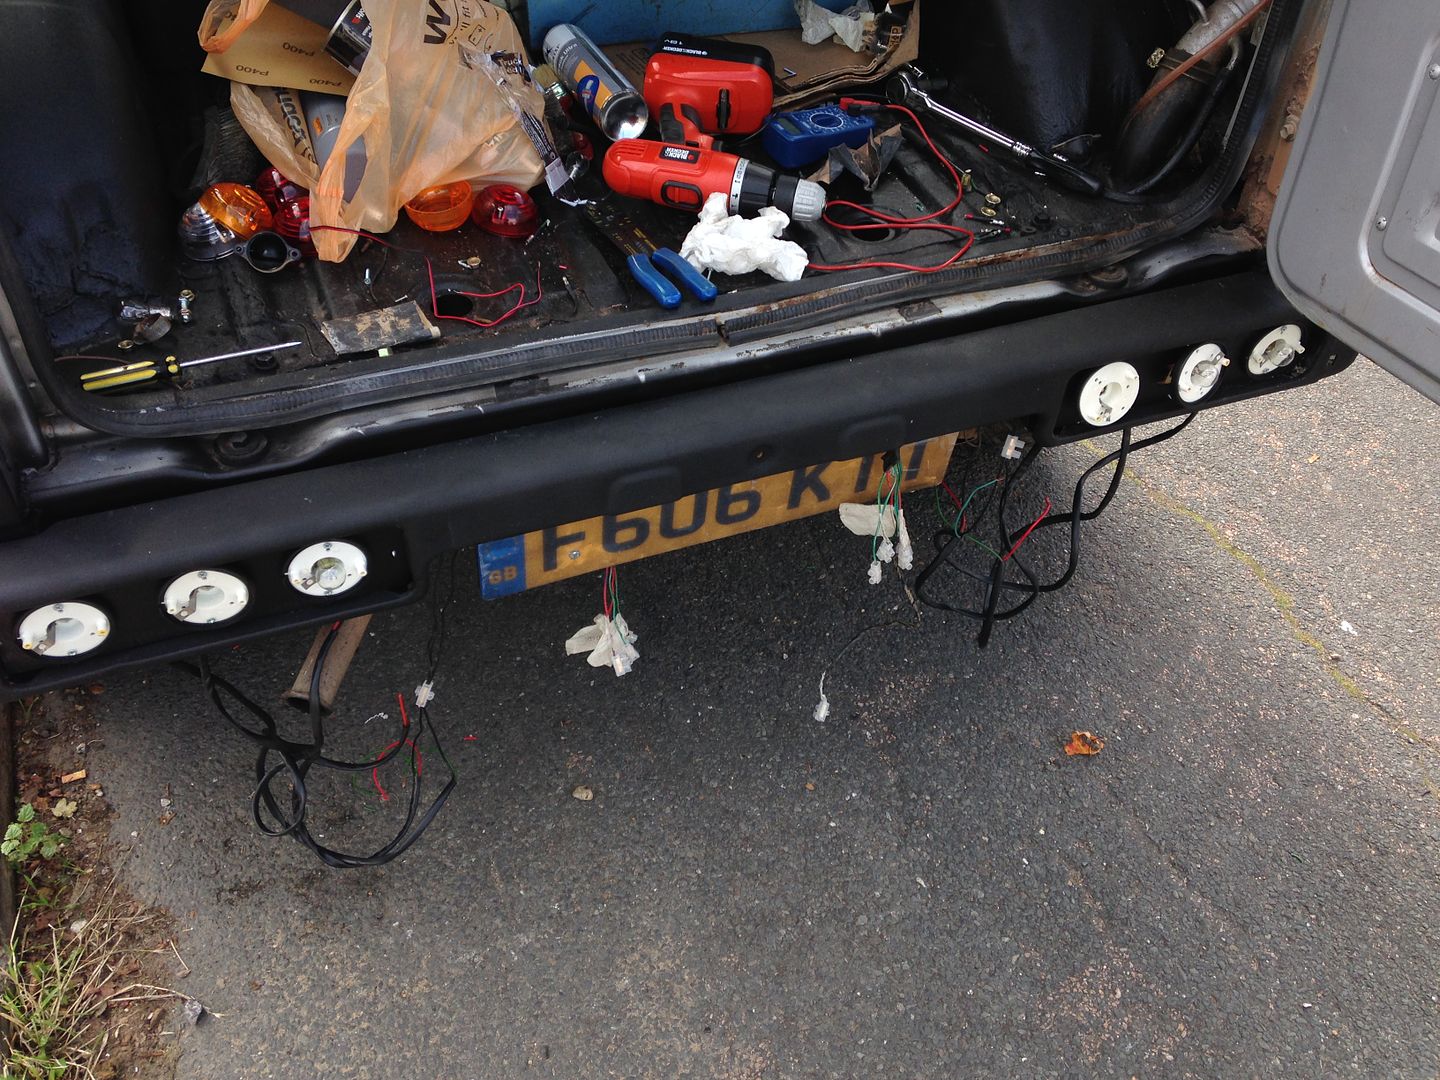
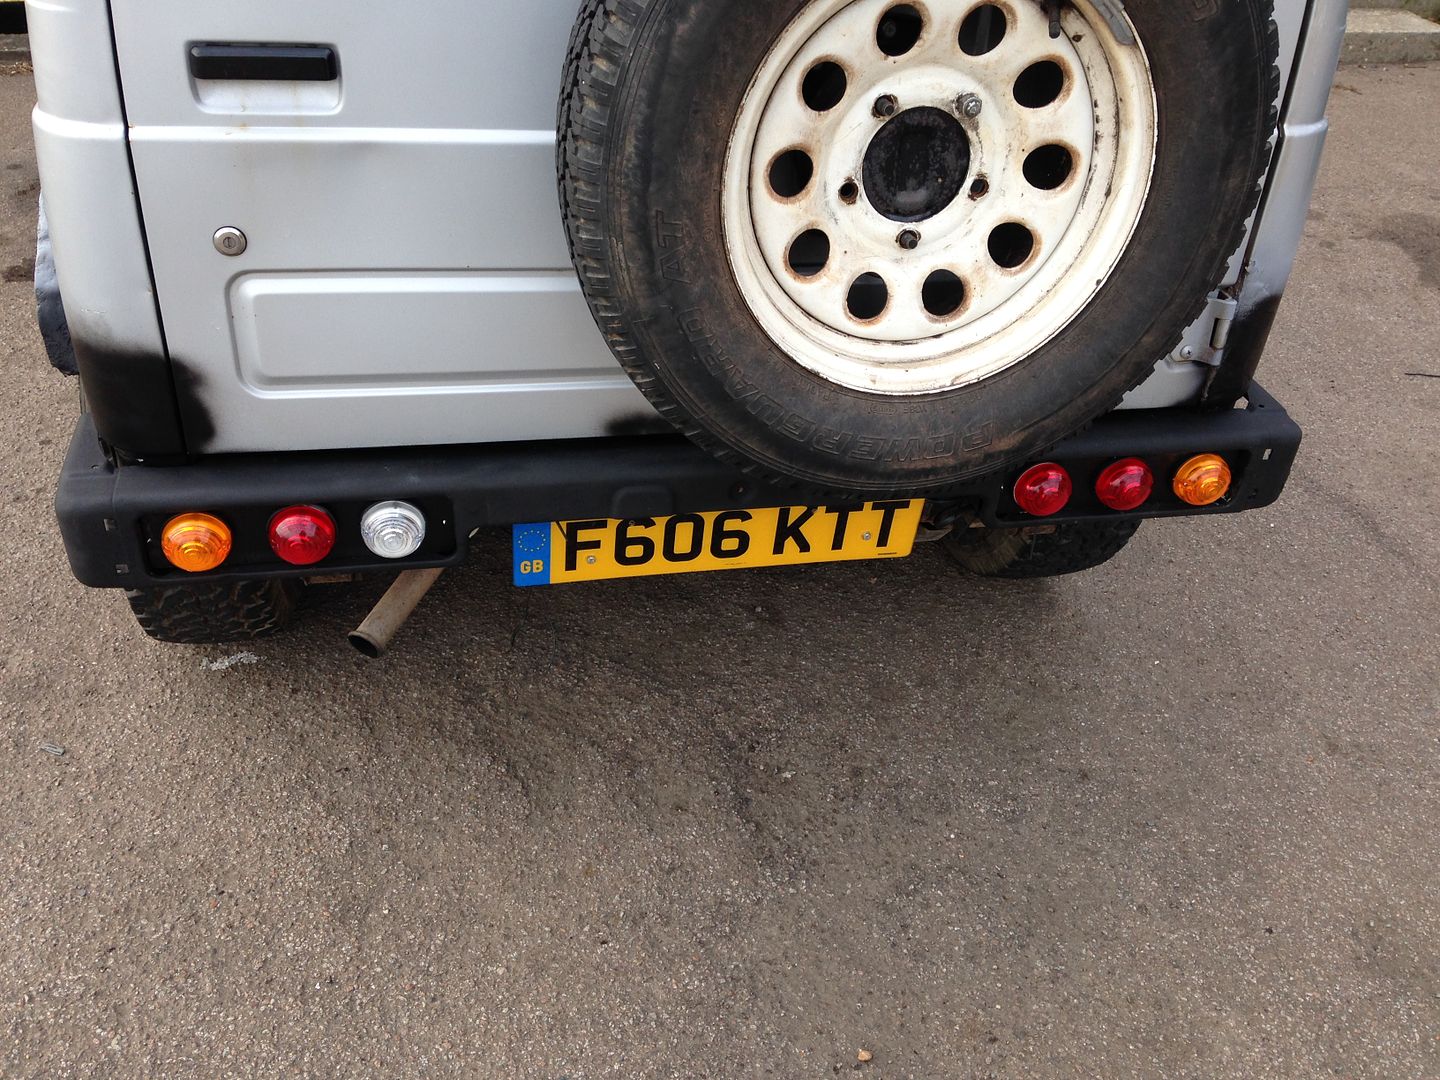
most of the rusty bits are pretty much cut out and repaired, need a few dry days for prep and prime and painting! but the car is legal for the road again so i can drive it to work \o/
 |
|
| Back to top |
|
|
Nejtun
*
Joined: 10 Jul 2011
Posts: 43
Location: Hastings
|
| Posted: Sun Oct 20, 2013 20:20 Post subject: |
|
|
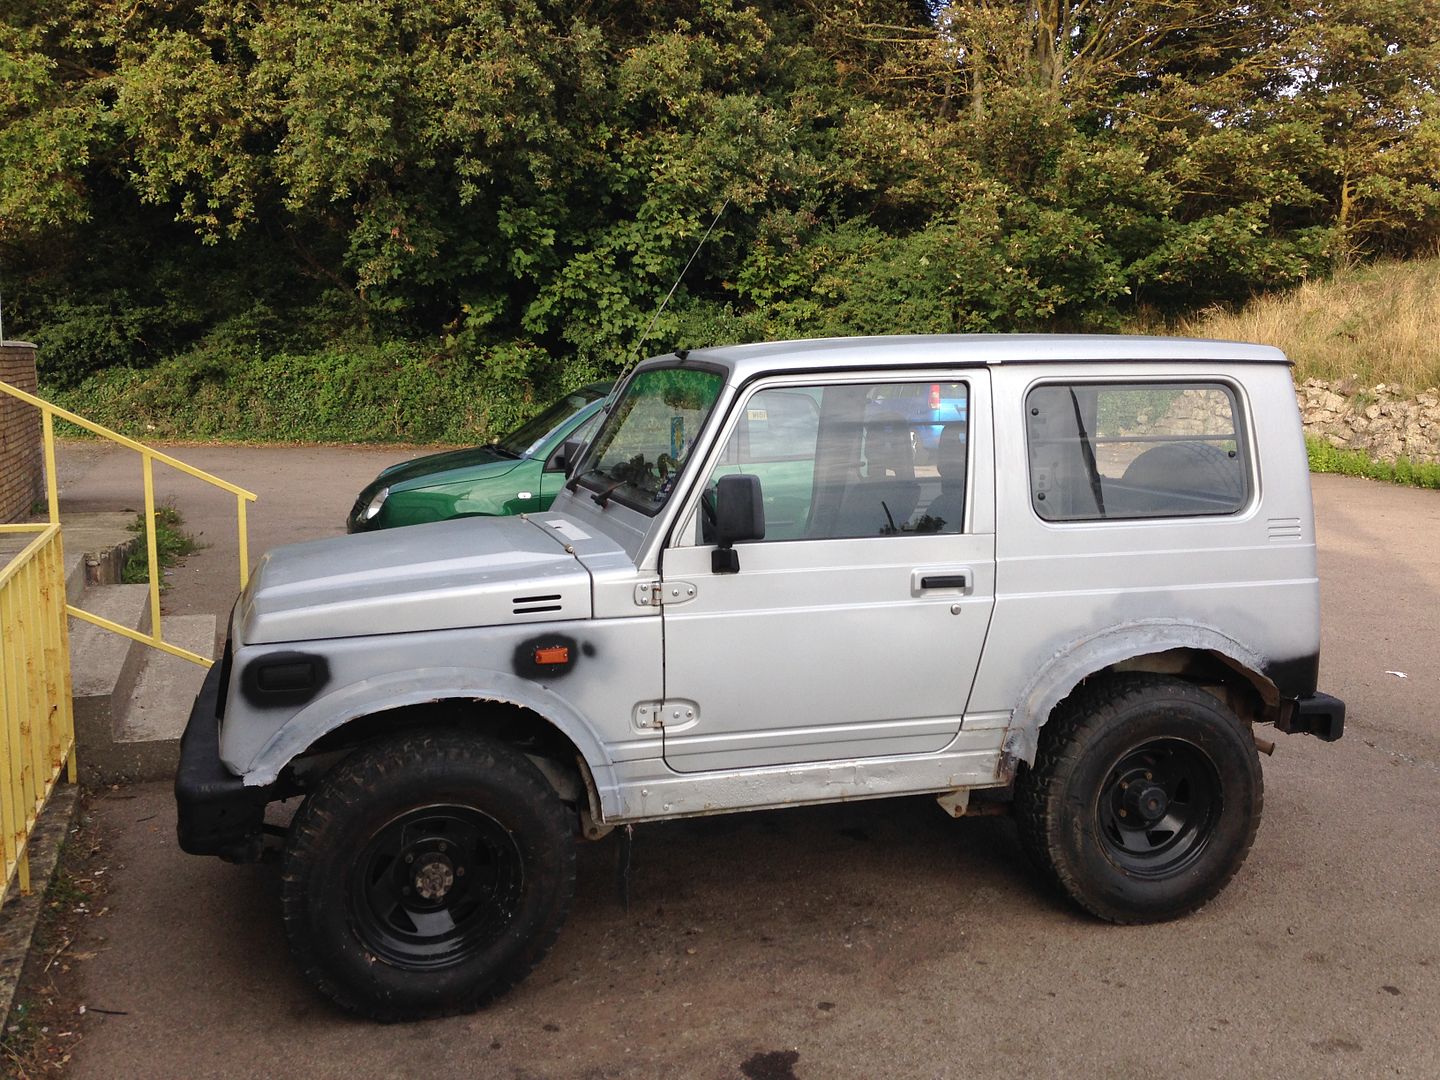
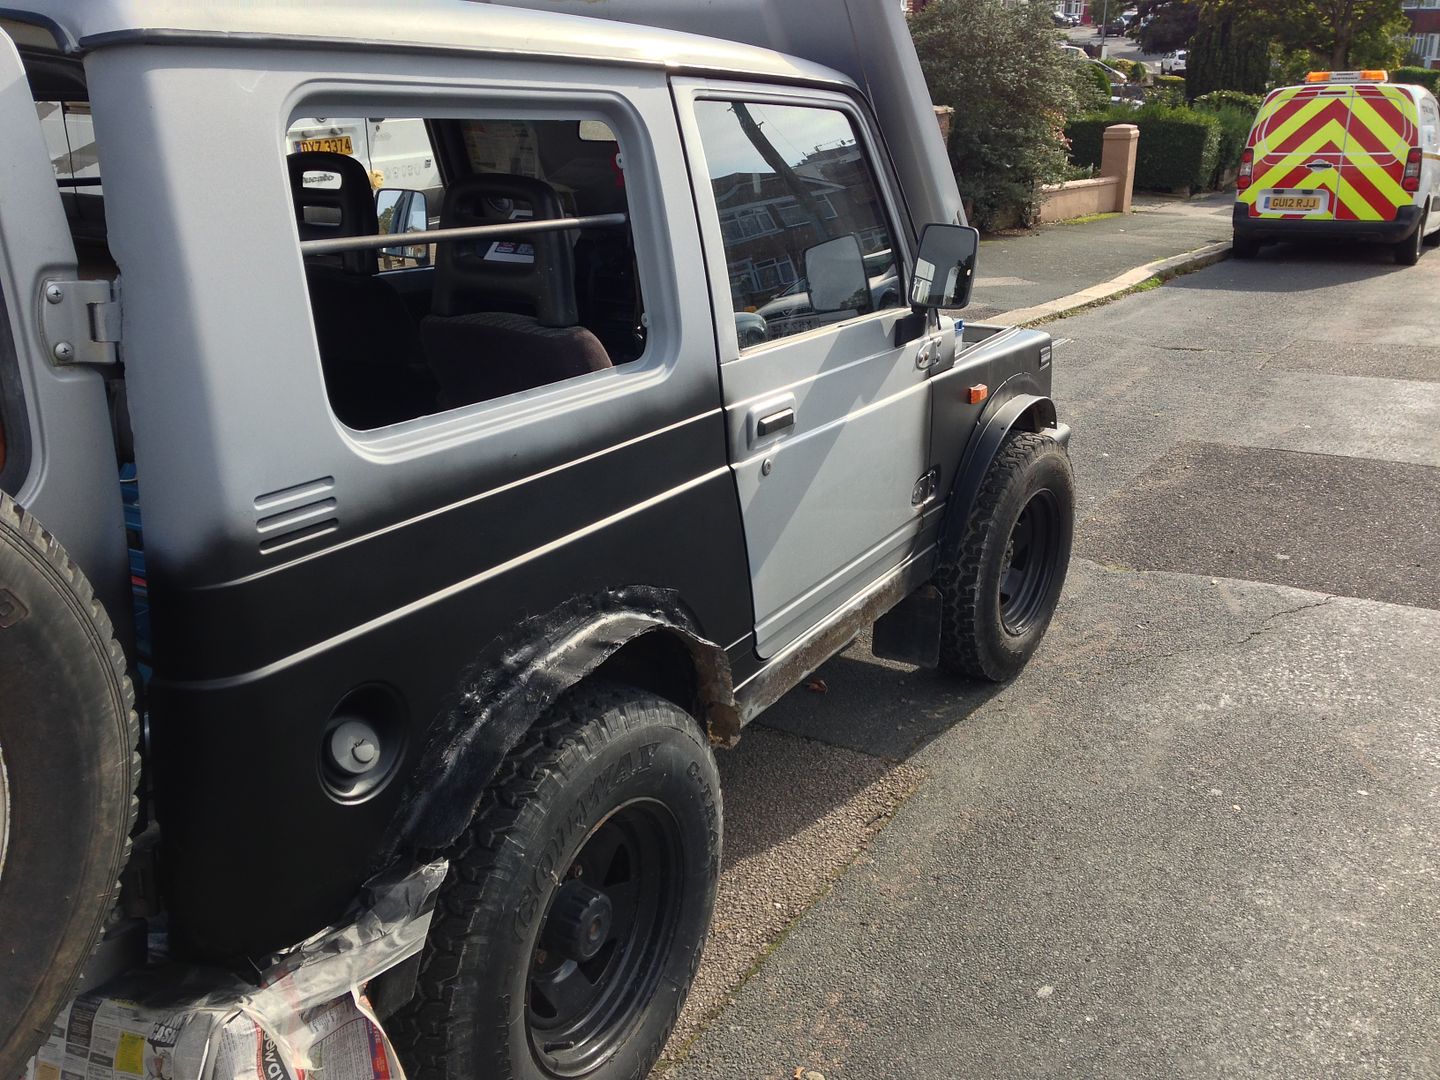
Running very short on dry weekend days now so the opportunities for painting are getting a bit scarce!
need to get the arches on ASAP though so wings first then the other bits.
a bit of masking so I don't have to scrape the glass later wait for the wind to drop a squiz of primer and hope like hell it doesn't rain over night !
My luck holds out and the Sunday is merciful with the weather, quick rub down then 3 layers of Matt Black before the sky gets all grumpy and attempts to ruin my weekend.
 |
|
| Back to top |
|
|
Nejtun
*
Joined: 10 Jul 2011
Posts: 43
Location: Hastings
|
| Posted: Sun Oct 20, 2013 20:28 Post subject: |
|
|
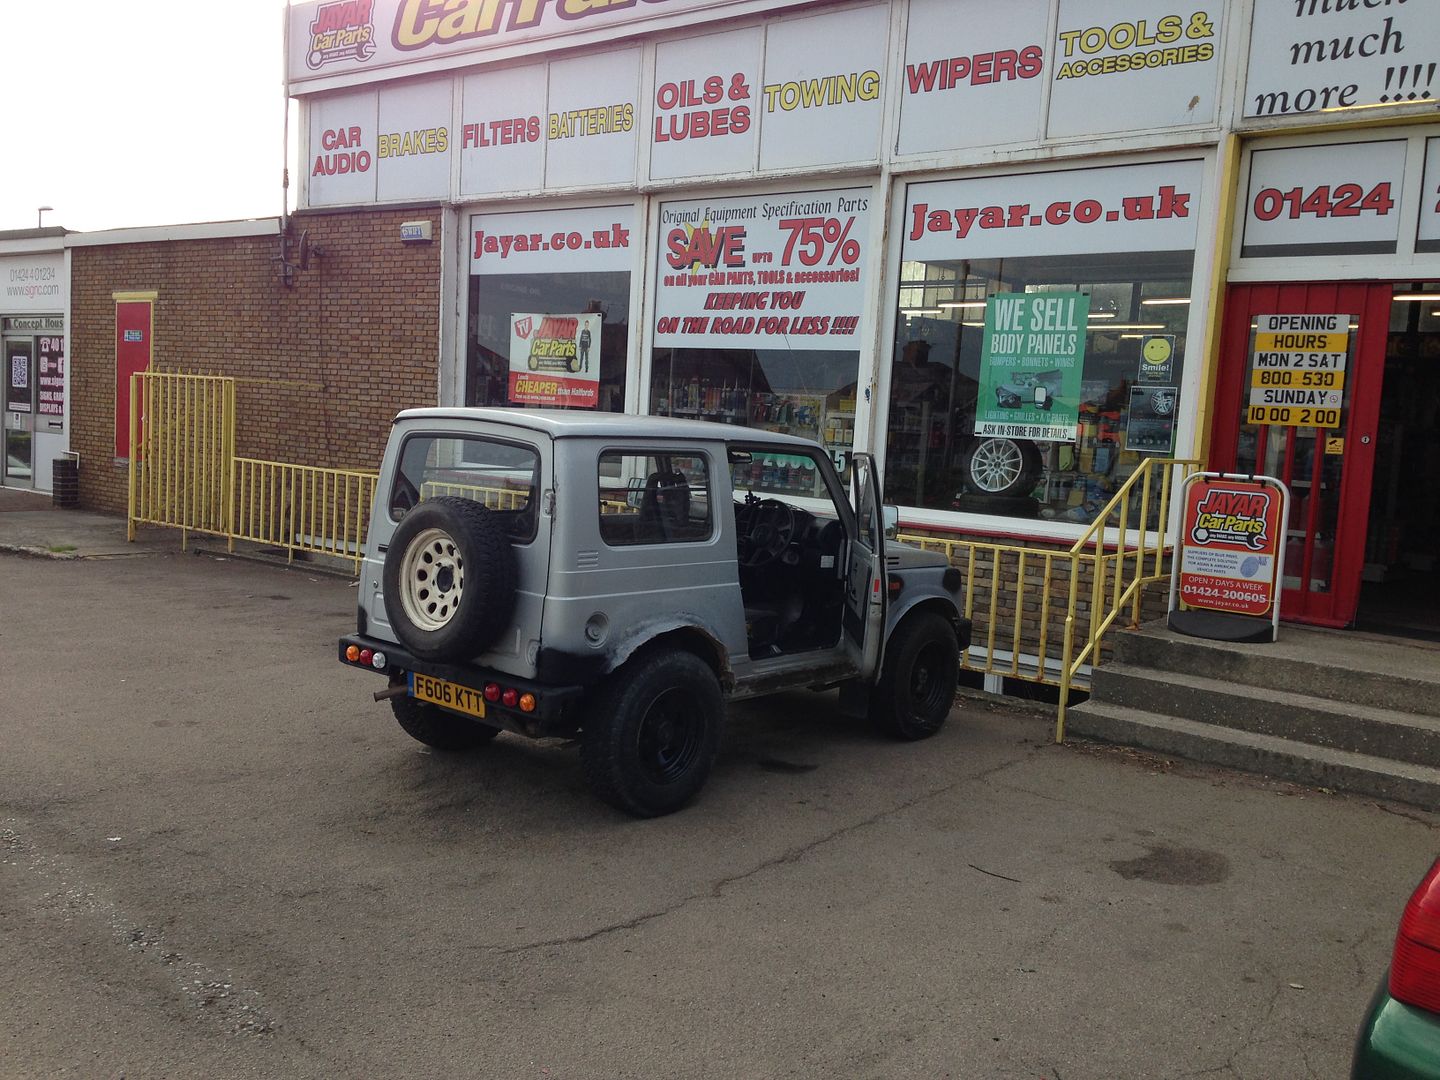
So, with the arches painted and dried some 32mm wheel spacers were the next to go on, forgetting of course to take a picture but what can you do?
Now however I risk getting busted by the boys in blue as there is about an inch of tyre sticking out! ( not that much but best to stay legal )
got some nice land rover arches and a friend with steady hands to get the arches lined up nicely, smashing it down with rain but the kettle is close by for a quick escape once the work is done.
 |
|
| Back to top |
|
|
Nejtun
*
Joined: 10 Jul 2011
Posts: 43
Location: Hastings
|
| Posted: Sun Oct 20, 2013 20:37 Post subject: |
|
|
The rain is now brutal so no more painting till luck is back on my side which means my car looks a bit like a chess board i'm told!
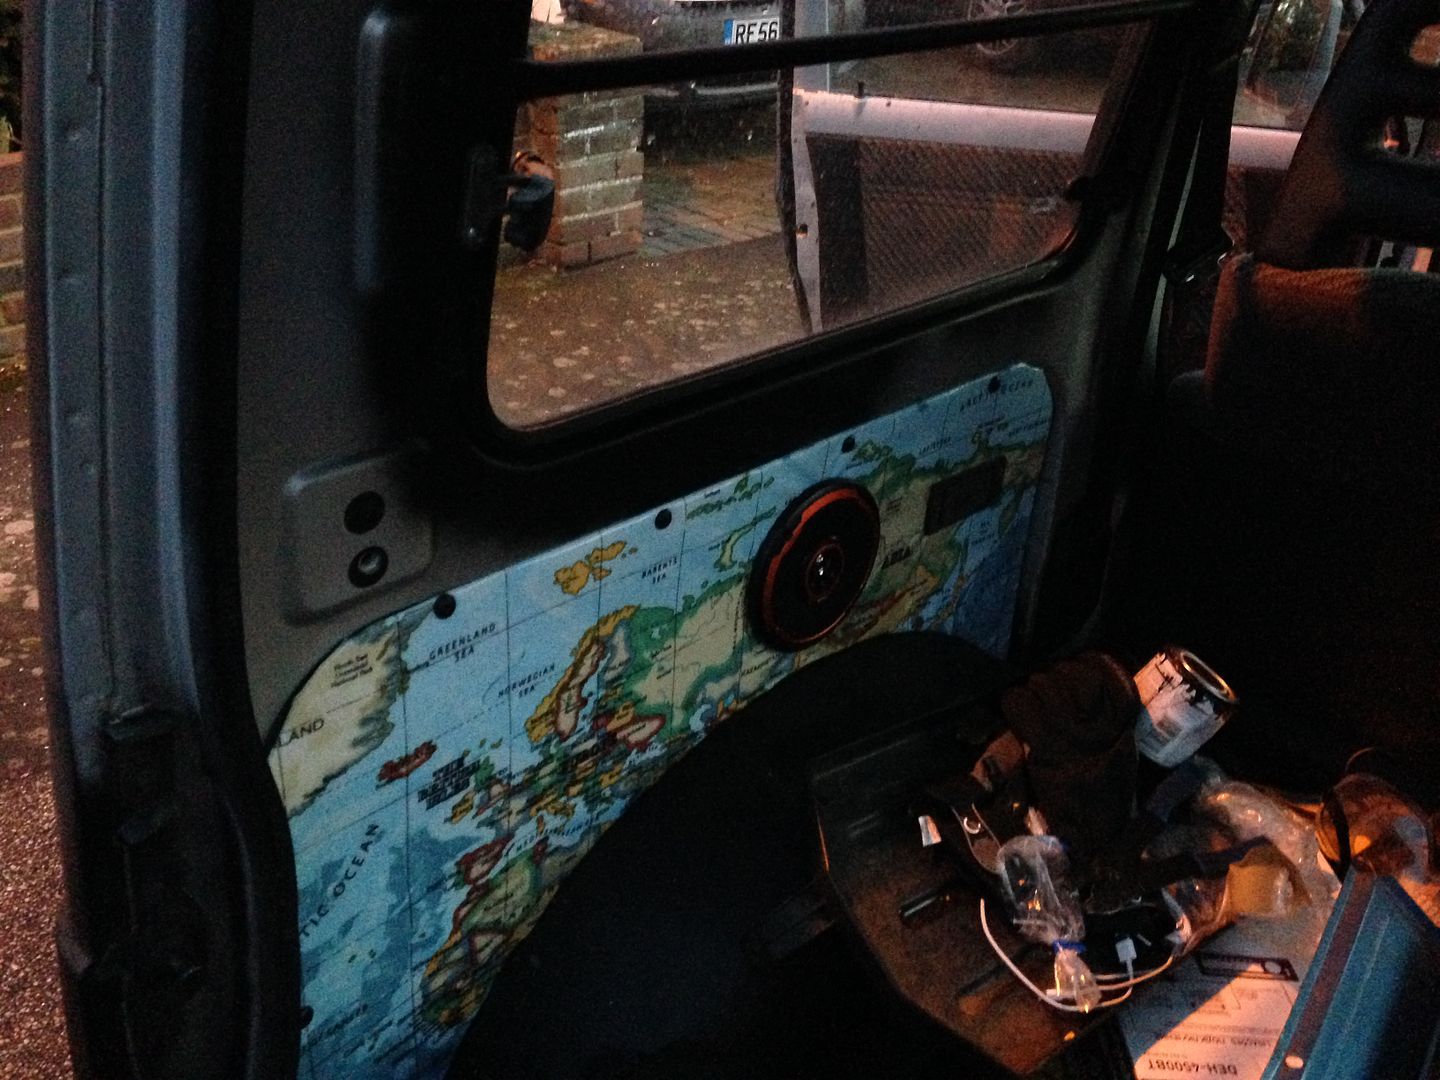
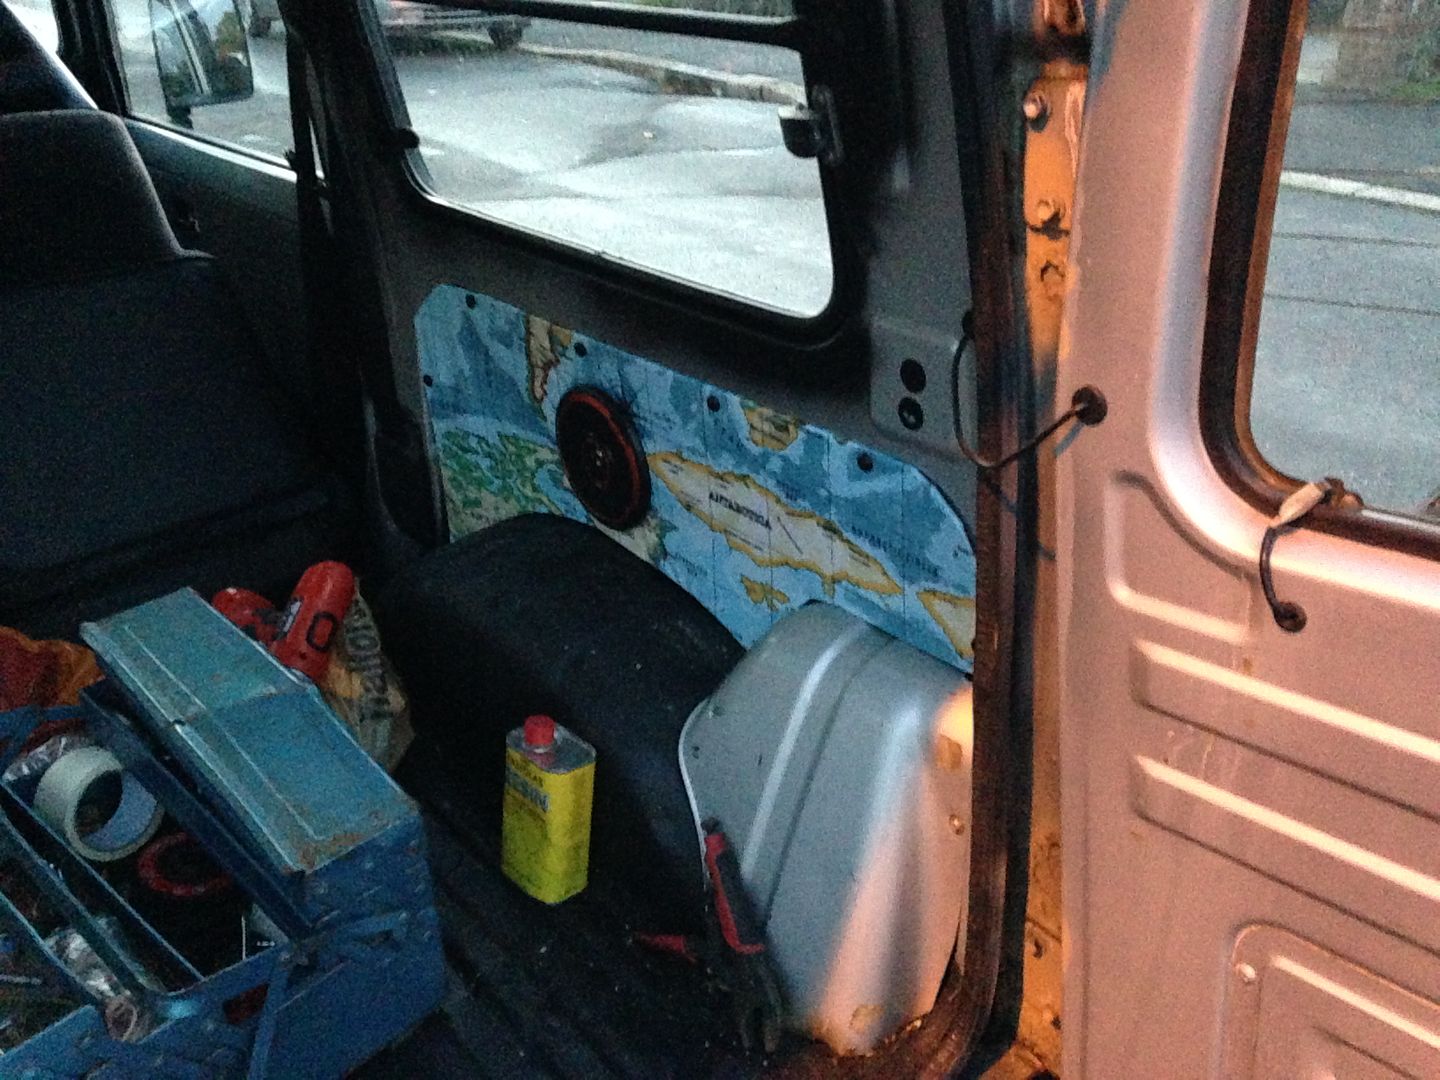
moving to the inside found some nice material for the rear interior panels a bit of 3mm hardboard and some bubble wrap to pad it out a bit.break out the trusty staple gun and with a quick hand from my sharp little friend 'stan le Knife' whipped up some new panels to replace the nasty rotting ones.
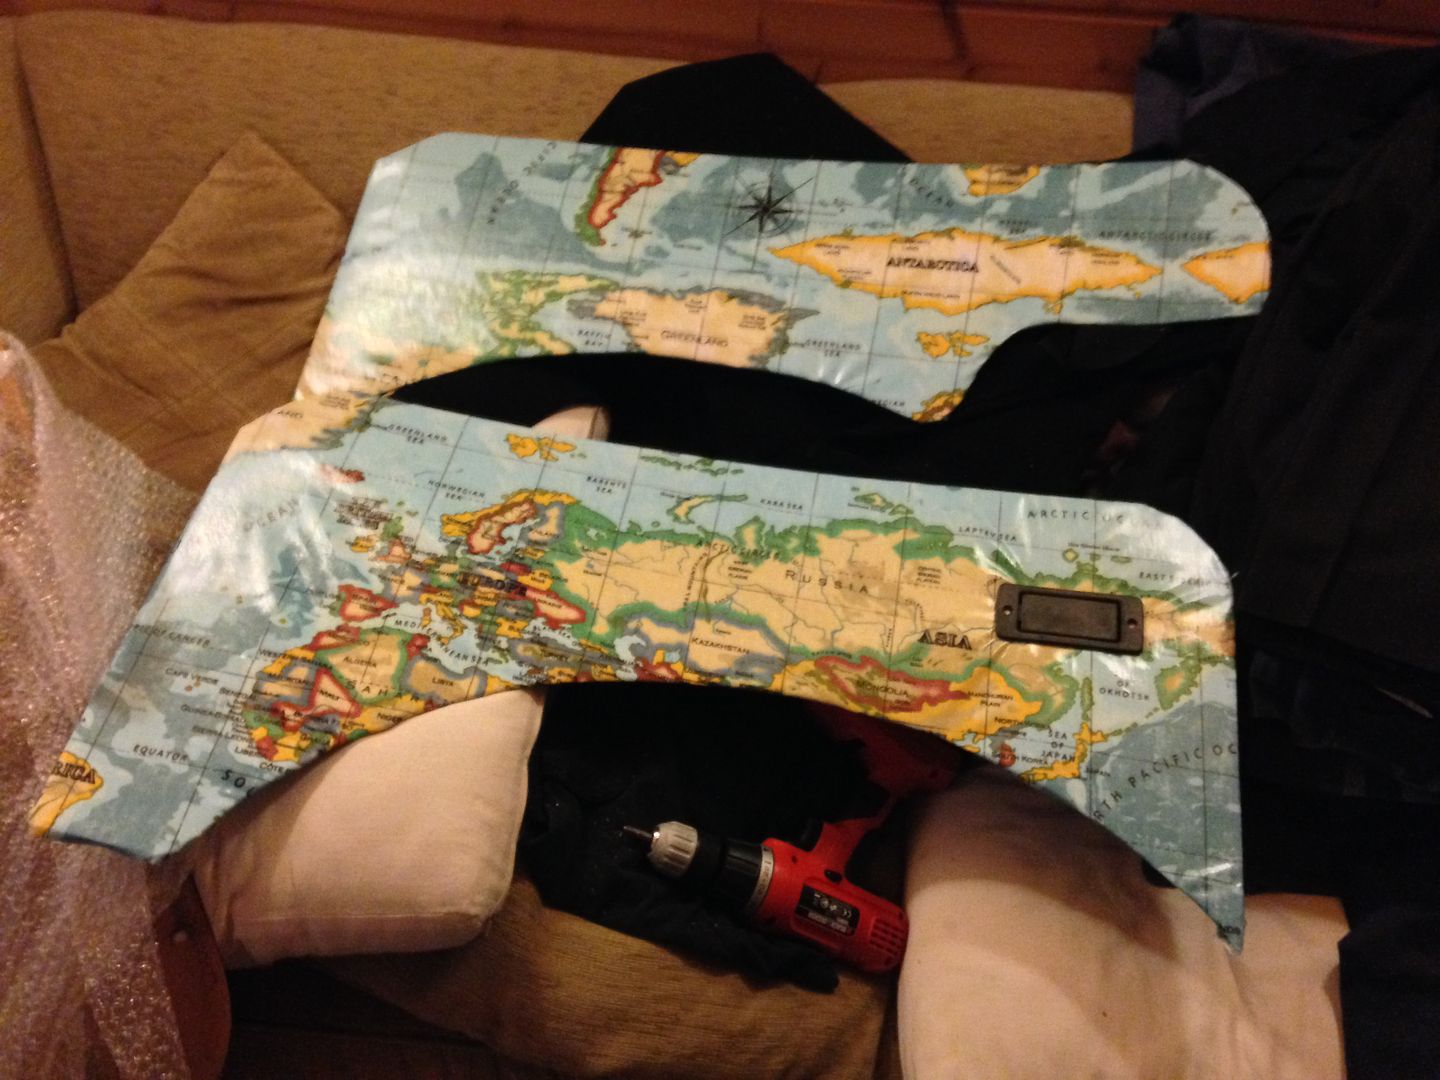
pop some speakers in before I fix them into the car and save myself a headache later.
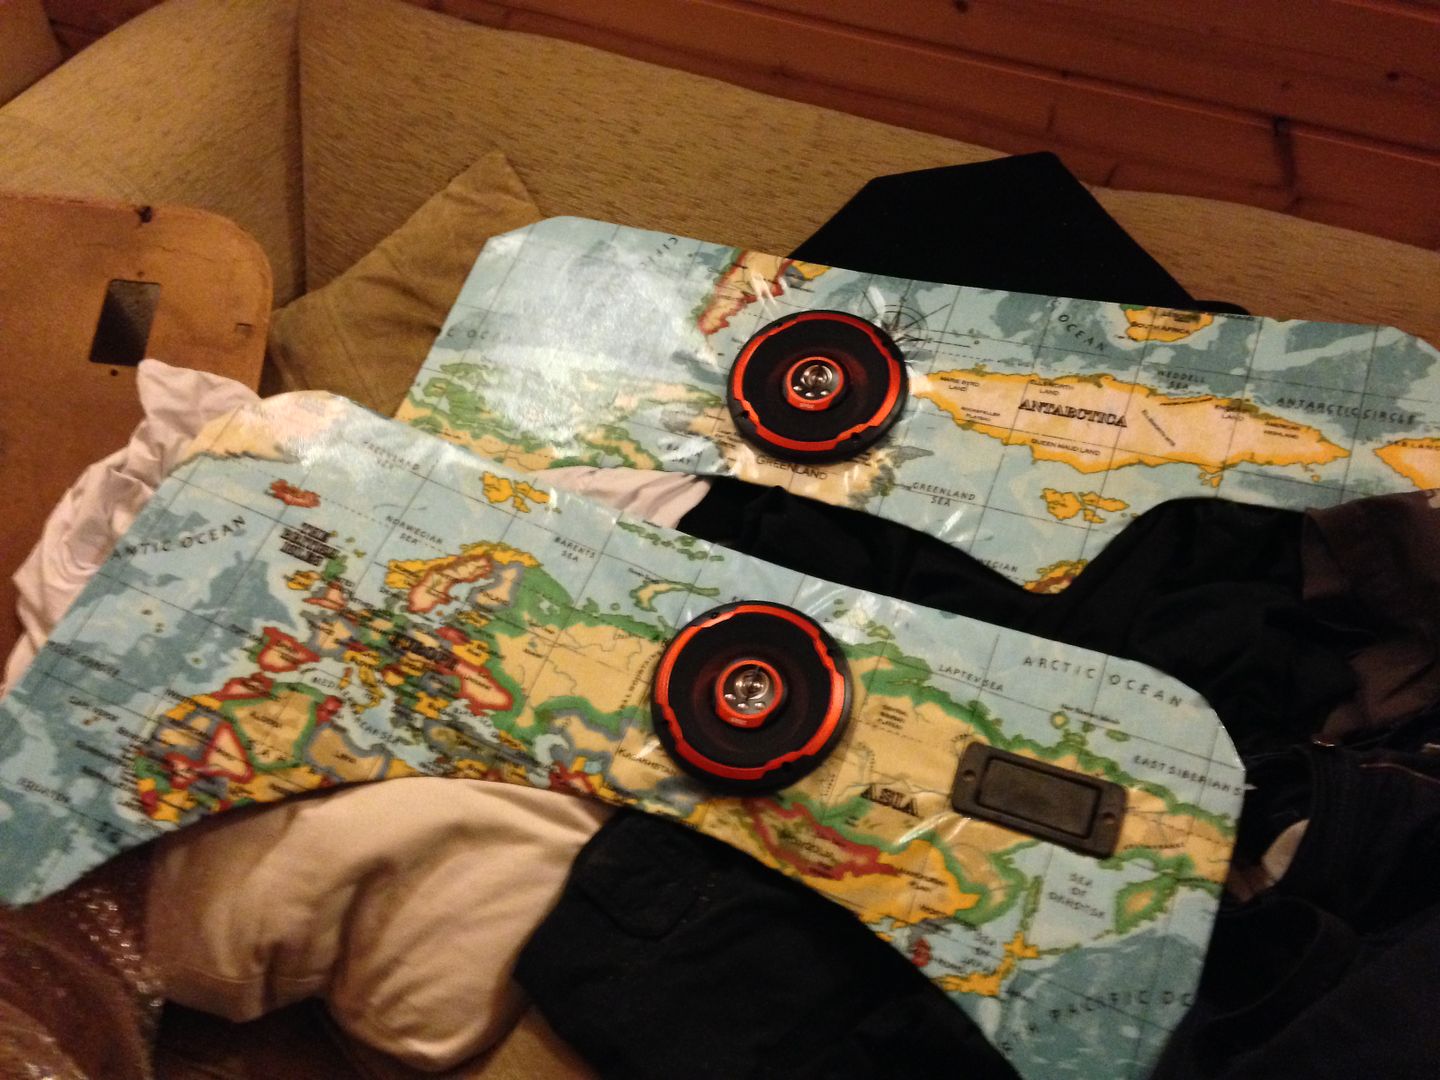
and fix them into place! might make them again later as they are not that nice a fit. what i wouldn't give to have a garage and a workbench instead of my sofa and a long walk to the car :p
 |
|
| Back to top |
|
|
DavidS
***

Joined: 30 Aug 2012
Posts: 188
Location: Maidstone, Kent
|
| Posted: Mon Oct 21, 2013 18:51 Post subject: |
|
|
I like it doing a great job there
_________________
2003 GV1600 Sport Soft Top. Great for Fun in Snow and sun |
|
| Back to top |
|
|
Nejtun
*
Joined: 10 Jul 2011
Posts: 43
Location: Hastings
|
| Posted: Tue Oct 22, 2013 6:19 Post subject: |
|
|
| Cheers ,all the roadworthy bits are now done. I'm still on about putting a 3 inch lift and 31 inch tyres on , i am not sure my engine is up to turning those fat wheels. I don't want to change from a 1.3 either really anybody tried 31 x 10.5 x 15's with the standard sammy engine? |
|
| Back to top |
|
|
Ratty
*
Joined: 28 Nov 2012
Posts: 11
Location: Hertfordshire
|
| Posted: Sat Nov 09, 2013 22:10 Post subject: |
|
|
Wow thats a bit rotty.
Looking good now.
Liking the map idea. |
|
| Back to top |
|
|
|


